




Custom Firmware App DFU Package
Create an Application DFU Package
A DFU package contains the Application binary plus the product identity, version, length, and integrity information required by Vision. Do not upload a raw Application .bin file.
1. Build the Application
- Open the Application project for the exact MCU.
- Select
ReleaseBL. This target links the Application atHW_FLASH_APPLICATION_ADDRESS. - Build the project and locate its generated
.binfile. - Check that the Manufacturer ID, Device Model ID, and firmware version match
Fixture/Inc/fixture_defines.h.
The supplied projects already generate a binary. When creating another Keil project, add an after-build conversion with fromelf.exe --bin --output .\Listings\@L.bin !L.
2. Open the generator
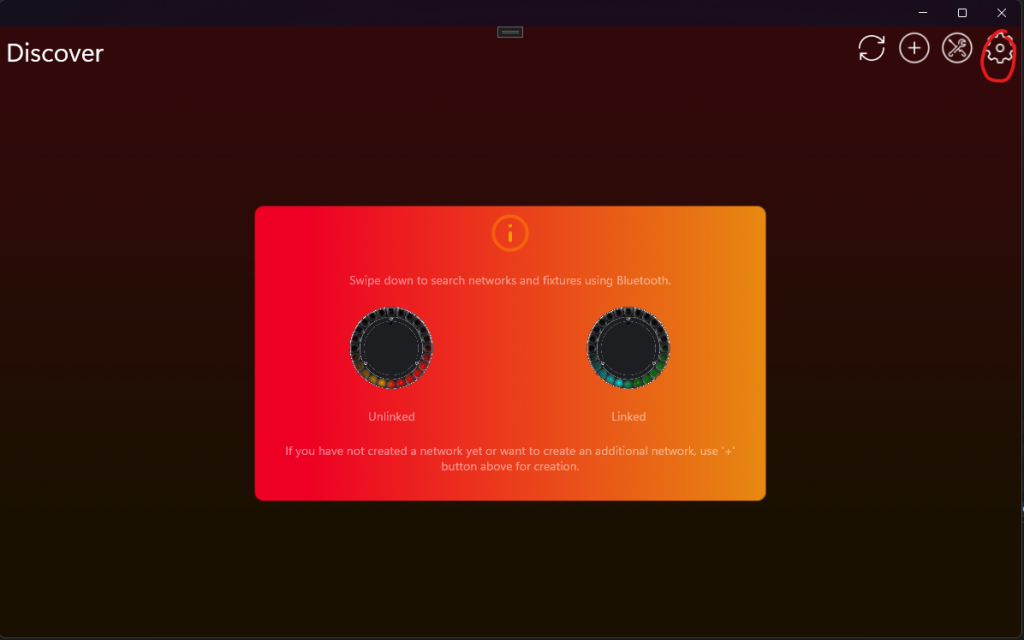
The generator is visible only in Test Mode. In the Windows Vision App, perform every step below:
- Open Settings with the gear button.
- Open App Settings.
- Tap the displayed App Software Version label twice.
- Enter PIN
7248in the prompt. Test Mode is now enabled and development fixtures that are not yet registered can be used. - Return to Settings, open Developer Tools, and select DFU File Generator.
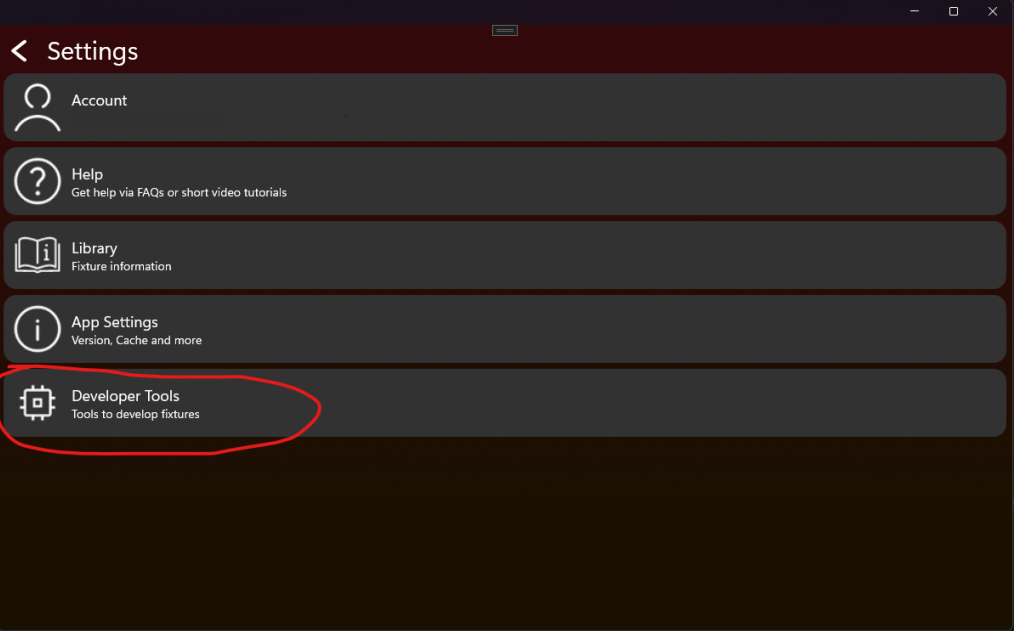
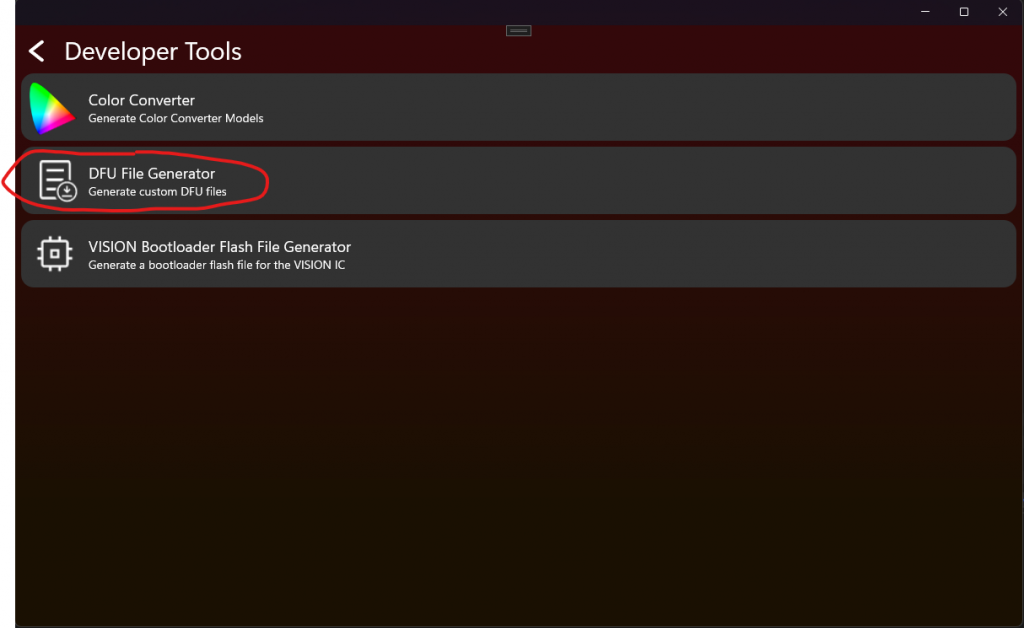
3. Enter package data
- Select the Application
.bin. - Enter the RDM Manufacturer ID and Device Model ID in decimal when requested by the current Windows tool. For example, hexadecimal
0xF00Ais decimal61450. - Enter the four firmware-version components from
fixture_defines.h. - Generate and store the DFU file.
Important: Manufacturer ID and Device Model ID protect the fixture against firmware for another product. Never use the example IDs for a production product, and never generate a package with values that differ from the firmware.
Major denotes incompatible behavior, Minor a compatible feature, Patch a bug fix, and Release is normally 255 for a public release.
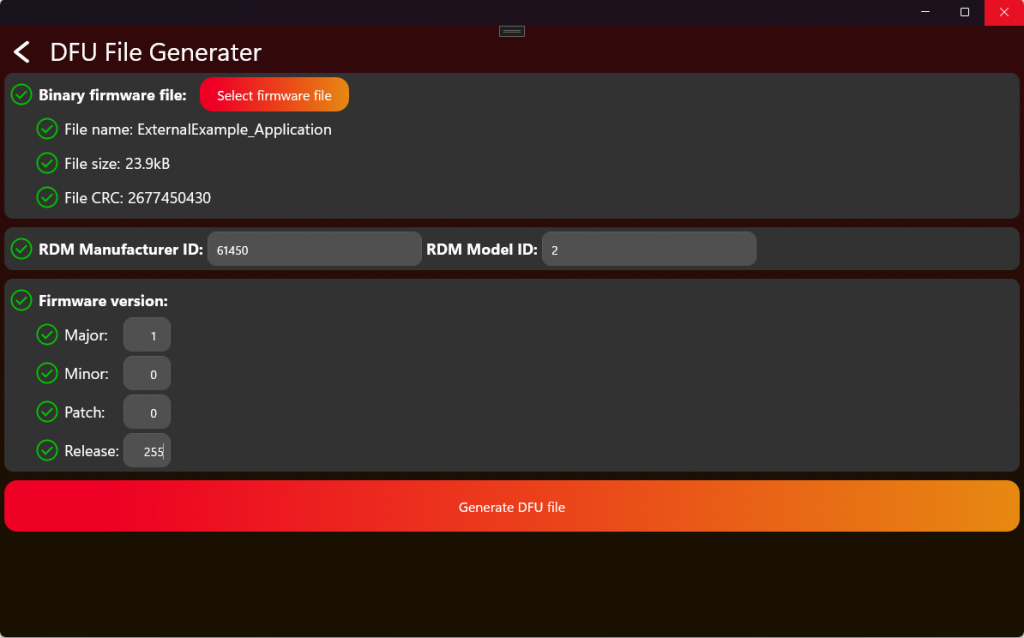
Press Generate DFU File and keep the generated package as the release artifact. It can be selected manually in the Vision App for a test update or uploaded to the Vision web service for the matching registered fixture. Keep the original ReleaseBL binary and its map file beside the package for traceability.
4. Test the package before release
- Connect one test fixture and confirm that its reported Manufacturer ID, Device Model ID, and current version match the package.
- Run a complete update using every enabled transport: direct Vision and/or Vision DMX Adapter.
- Confirm that the Bootloader receives the pending start request, validates the header and CRC, and starts the new Application.
- Power-cycle the fixture and verify the new version, saved serial number, RDM identity, DMX behavior, and normal startup.
- Keep the package out of production distribution until these checks pass on the target PCB.
5. Choose the DFU receiver and transport
#define FIXTURE_ENABLE_DFU_USING_VISION              1
#define FIXTURE_ENABLE_DFU_USING_VISION_DMX_ADAPTER  0
#define FIXTURE_DFU_RECEIVER                         DFU_RECEIVER_BOOTLOADER
FIXTURE_ENABLE_DFU_USING_VISION and FIXTURE_ENABLE_DFU_USING_VISION_DMX_ADAPTER independently enable DFU through Vision or through the wired Vision DMX Adapter. DFU_RECEIVER_BOOTLOADER is recommended because it does not require external firmware storage. In this mode, the Application stores the DFU reboot request and resets immediately without answering the pending Vision start flag. The Bootloader answers that still-pending flag and receives the firmware.
Select DFU_RECEIVER_APPLICATION only when the product has reliable external storage large enough for the complete DFU image. Then complete every step below:
- Copy
Template/Fixture/Src/fixture_dfu_staging.cinto the productFixture/Srcfolder. Do not editFramework/Interfaces/Fixture/fixture_dfu_staging.h. - Set
FIXTURE_DFU_RECEIVERtoDFU_RECEIVER_APPLICATIONand add the copied source file to both the Application and Bootloader targets. - Implement
FixtureDfuStagingVisionBegin(),FixtureDfuStagingVisionWrite(), andFixtureDfuStagingVisionFinish()when Vision transport is enabled. - Implement
FixtureDfuStagingAdapterBegin(),FixtureDfuStagingAdapterWrite(), andFixtureDfuStagingAdapterFinish()when Vision DMX Adapter transport is enabled. - Implement
FixtureDfuStagingInstall()for the Bootloader-side external-to-internal Flash copy. - On begin, erase only the external staging area and reset packet tracking. Reject a second transport while one update is active.
- On every write, validate indices and lengths, store packets at deterministic positions, track duplicates and missing packets, and never overwrite the running Application.
- On finish, reject an incomplete image and validate identity, declared image size, firmware limit, and complete external-image CRC before requesting
DFU_REBOOT_APPLY_STAGED_UPDATE. - During install, validate the external image again before erasing internal Flash, copy with the MCU-required alignment, validate internal Flash after writing, and mark completion only after every check succeeds.
- Interrupt power during erase, packet reception, final validation, internal erase, internal write, and completion marking. After every interruption, the device must either resume safely or remain recoverable in the Bootloader.
The Template functions intentionally return false; selecting Application reception without replacing every pseudo operation is an incomplete product implementation.