App Control Configuration
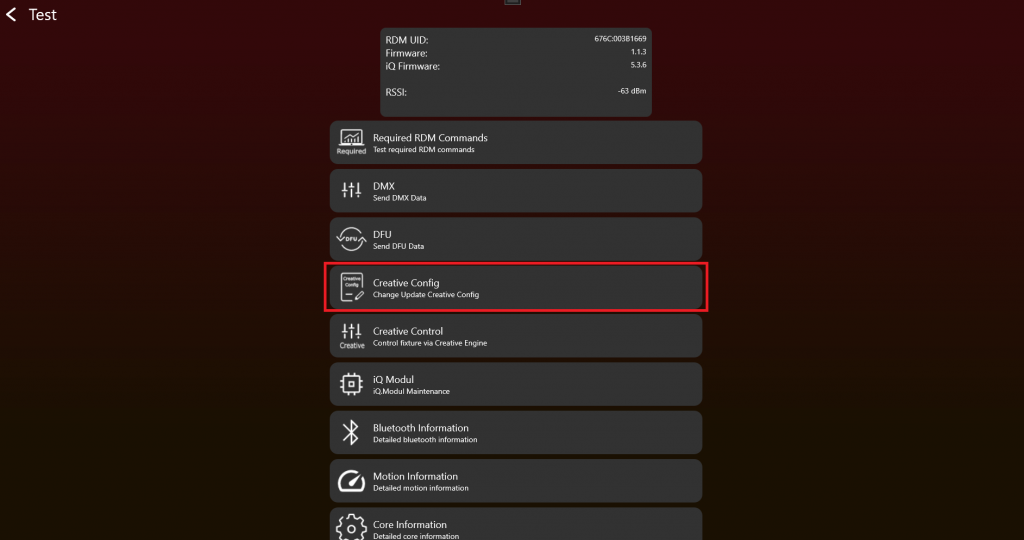
After enabling the Test Mode and connecting to the fixture it should look like this. To create an App Control Configuration, click on "App Control Configuration":
Legacy naming: App Control Configuration was previously called Creative Configuration or Creative Config. Older screenshots, app versions, file names, or URLs may still use the old name.
If everything works so far, the fixture can be prepared for App Control. Here you can create, load, or write an App Control Configuration. Each fixture type needs an App Control Configuration to be controlled through App Control. The App Control Configuration consists for example of the number of pixels, their position, and related fixture control data.
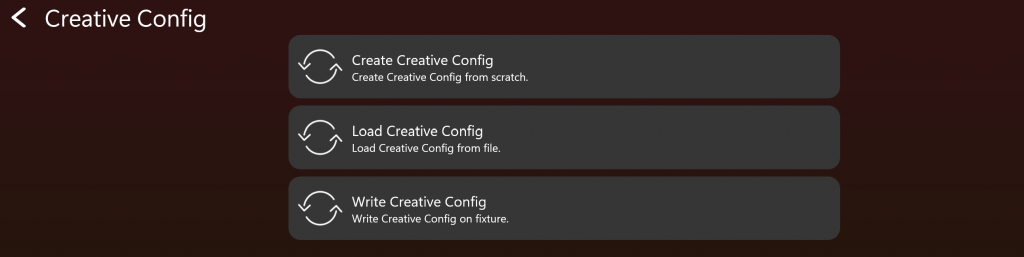
Start by creating an App Control Configuration. Press Create App Control Configuration.
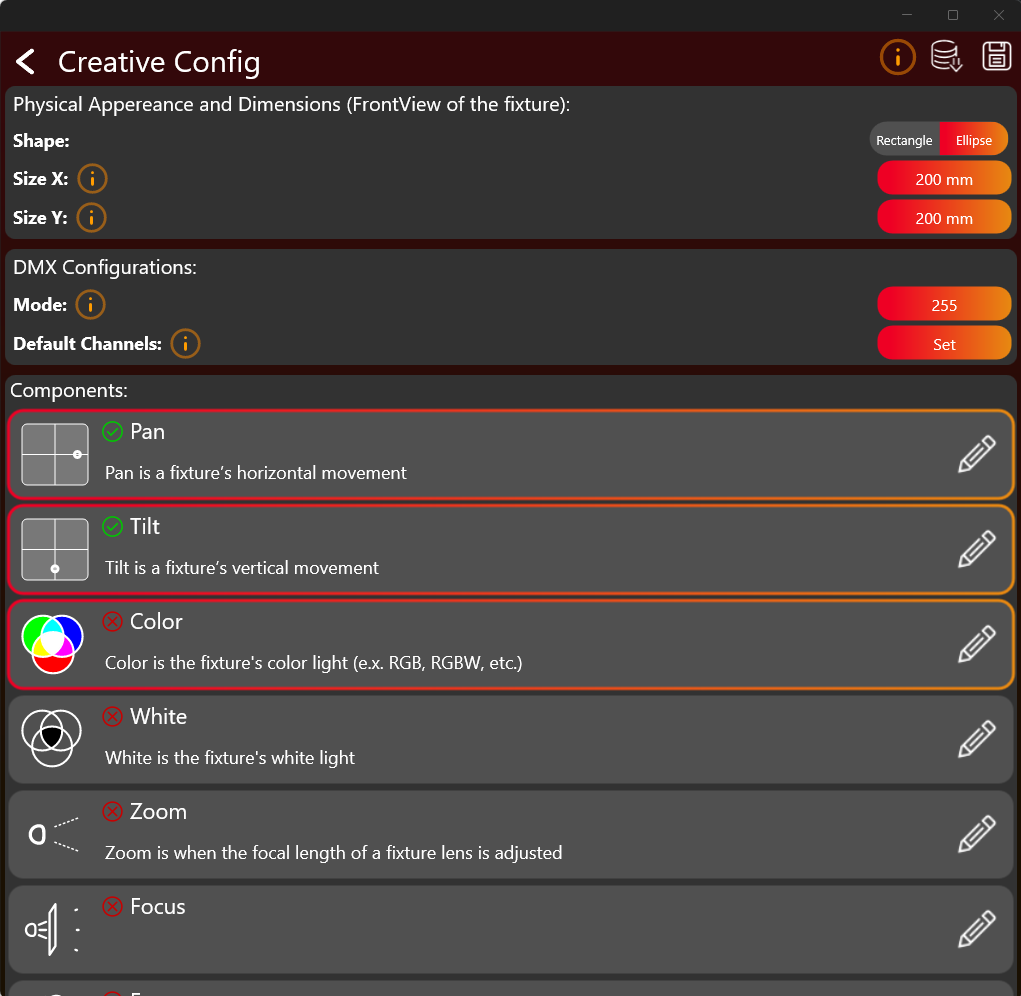
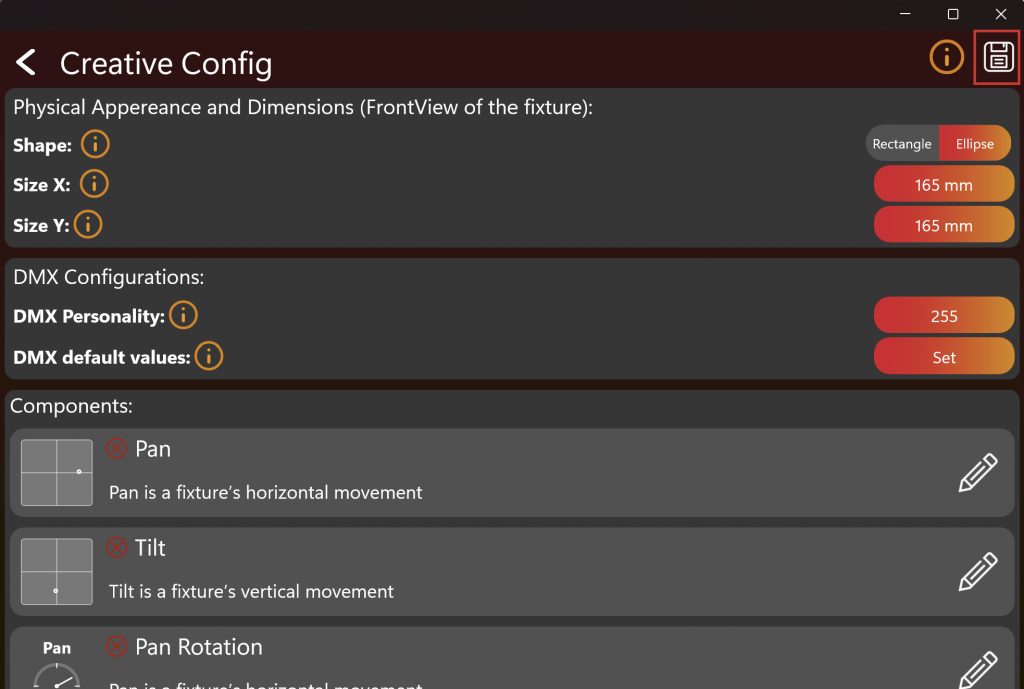
Click on the buttons to set the desired values. Select and configure each required component (like Pan, Tilt Color, White, Zooms, Focus, Smoke etc). Tapping on the whole frame selects the component. Select only components your fixture actually supports. By clicking on edit pencil on the right the configuration can be edited. A green checkmark indicates that the configuration for this component have been done.
Use the orange info „i“ buttons to get more information to the regarding topic.
After finishing the configuration you should save it as a .json file and write it to the fixture via the buttons on the top.
Color Component
The Color Component can be quite challenging to configure. So there are some more detailed information explained here. After pressing the edit button of the Color Component a new window appear which looks like this:
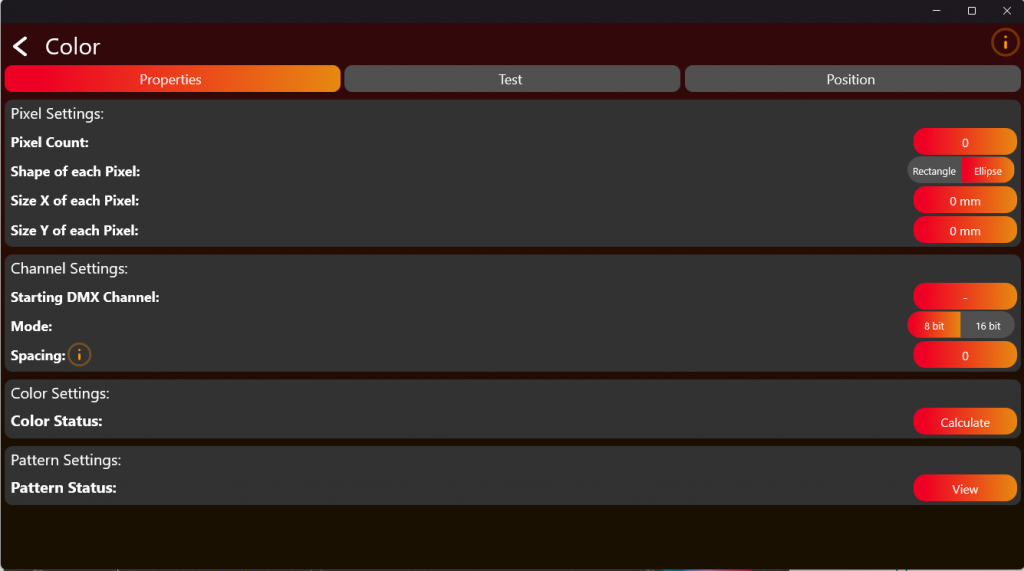
Here you have to define the pixel count of the fixture. Just the pixel which are controllable through DMX. Then put in the DMX information on how to control the LED’s. After configuring have to test and Position your pixels using the tabs in the top. Click on Calculate to get to the Color Settings.
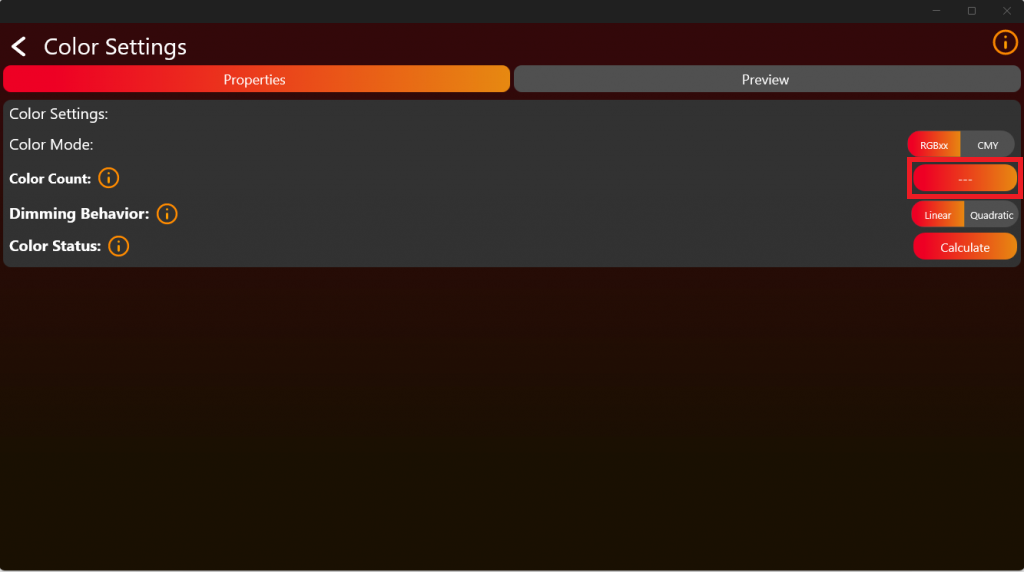
Now we come to the difficult part. The Color Settings:
Select the Color Count of the fixture. RGB for example has 3 colors. For the next steps we need the Color Information:
Therefore we need the spectral output of each Color at full in brightness relative to each other. For this kind of measurement you could use any spectrometer which has a resolution of 1nm over the Range from 380nm to 780nm. For Example the UPRTEK MK350N Premium.
Therefore place the fixture in a appropriate distance to the spectrometer. Make sure the mixing of the colors from the fixture on the detector is as good as possible. Also measure the colors with an appropriate cooler temperature when there is no temperature compensation on the fixture side. Measure each Color independent as you can see in the following picture. In this example it is done via a RGBW LED Source. We support up to 6 Color LED Sources.
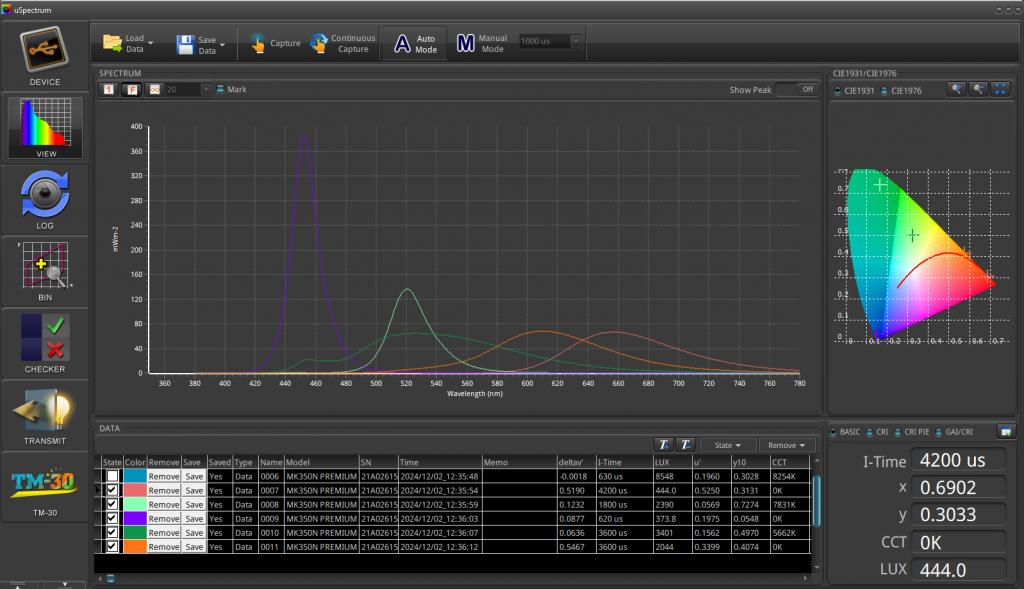
The following example is with the UPRTEK MK350N Premium:
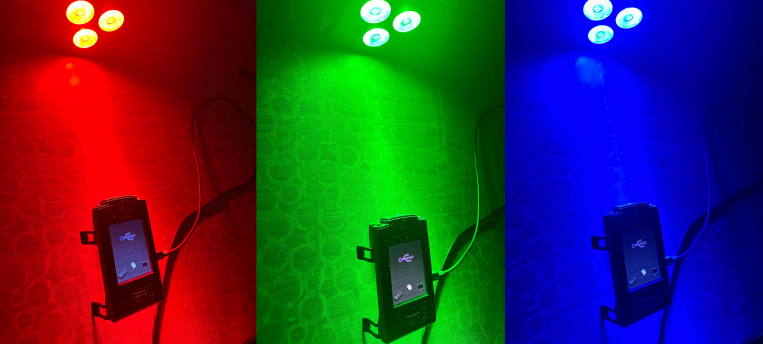
After measure you should get the spectral response of the color relative to the others. Like this:
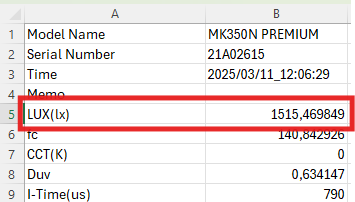
The results of the UPRTEK MK350N Premium will be saved in an Excel file. Refer to the provided document for an example format:
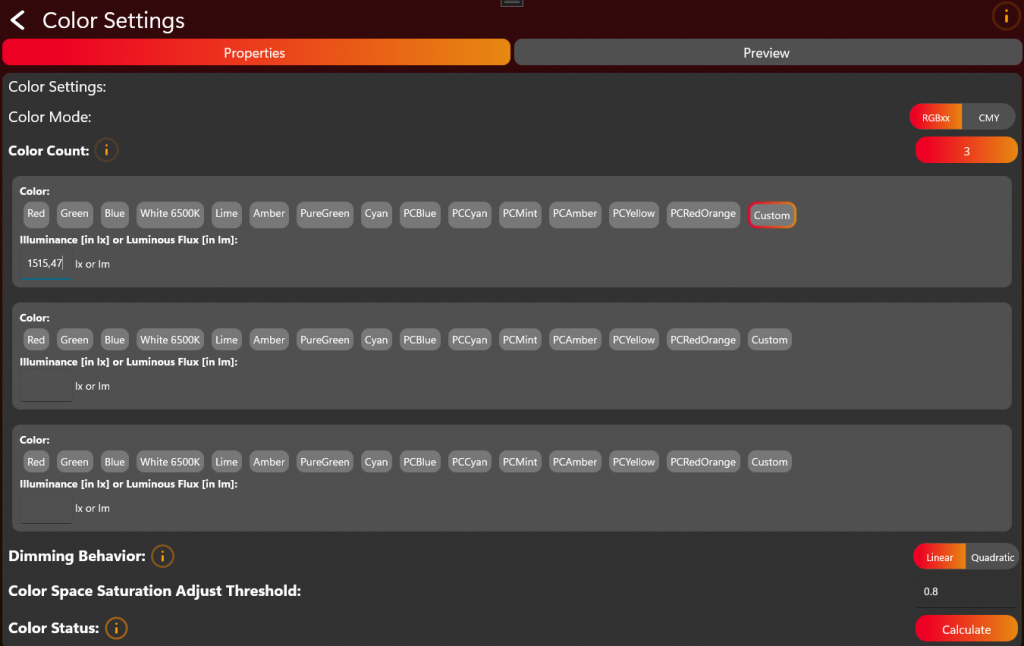
The necessary illuminance value is LUX (lx), in our example, it is approximately 1515.47 lx.
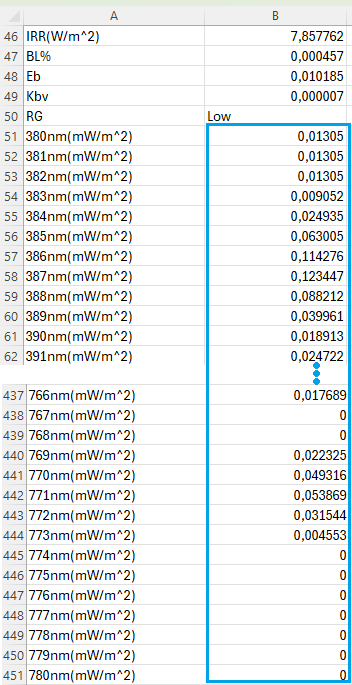
In the next step, extract the required spectral data from 380 nm to 780 nm (mW/m^2). Refer to the image for an example:
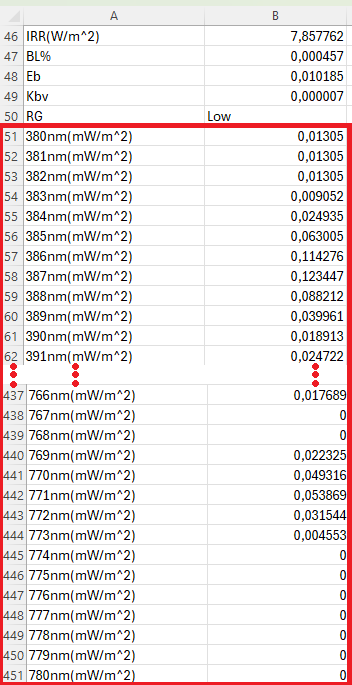
Copy the values displayed within the blue square:
Insert the values into a new .txt file while ensuring the required format is met. For better understanding, refer to the example file.
Format requirements:
- The decimal seperator must be a „.“ (dot). Values must be separated by a „,“ (comma). All values should be arranged in a single line without line breaks.
This can be achieved for example in Notepad++ using Find and Replace function:
- Replace „,“ with „.“
- Replace „\r\n“ with „,“ (Ensure Search Mode is set to Regular expressions).
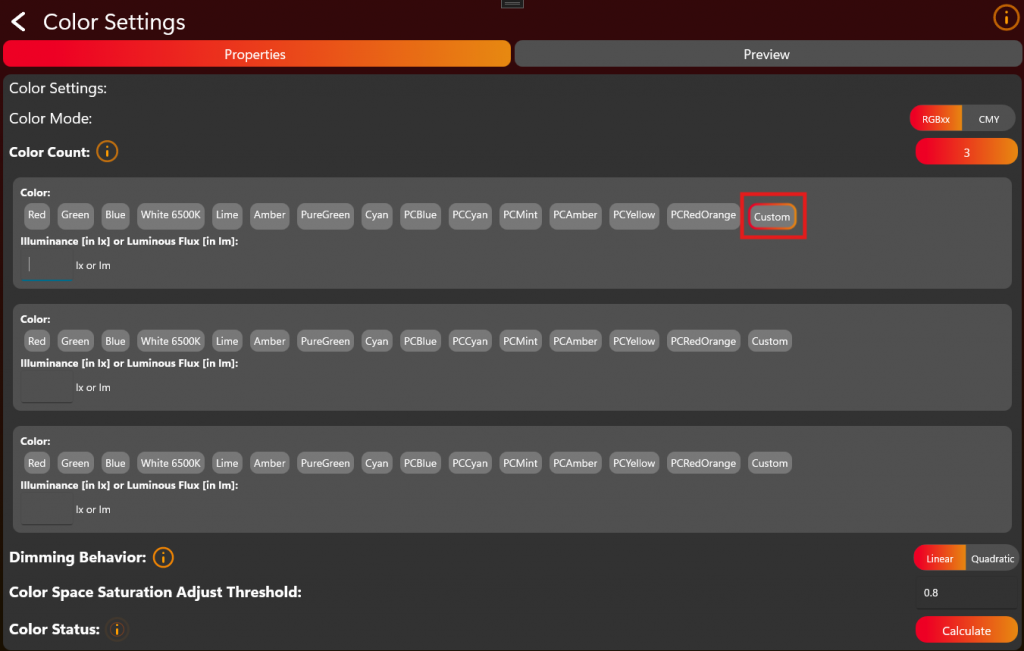
In the picture below it is a configuration for 3 Colors, for example RGB. From the available options, select „Custom“, then you will be prompted to upload the .txt file containing the spectral data:
You can enter either the illuminance in lux (lx) or the luminous flux in lumens (lm) for each color.:
Repeat and upload the spectral data and enter the illuminance value for all LED colors.
When finished press Calculate and wait until the calculation is finished. Depending on the ColorCount this may take some time.
Save and Write App Control Configuration
Now you have finished the App Control Configuration and we are back on the first editing page. In the top right, save the configuration as a file or send it directly to the fixture for testing:

In order to upload it later to the web-service you need to save the file. The next chapter test controlling requires this to be written on the fixture.