



Create App Library Create Fixture
Create the fixture entry after the company account exists and the final fixture identity is clear. The fixture entry is the App Library record used by the Vision Control App to recognize the product and load the correct app data.
Before you start
- Final RDM Manufacturer ID.
- Final RDM Device Model ID.
- Fixture name, brand name, product description, website, and support information.
- Serial number format used by the fixture.
- Final or release-candidate firmware file.
- Final App Control Configuration that matches the firmware.
- Fixture image, app icon, and optional documents such as manual, DMX chart, or technical data sheet.
Important: the RDM Manufacturer ID and RDM Device Model ID must stay stable after release. These two values are how Vision identifies the fixture type.
Open My Fixtures
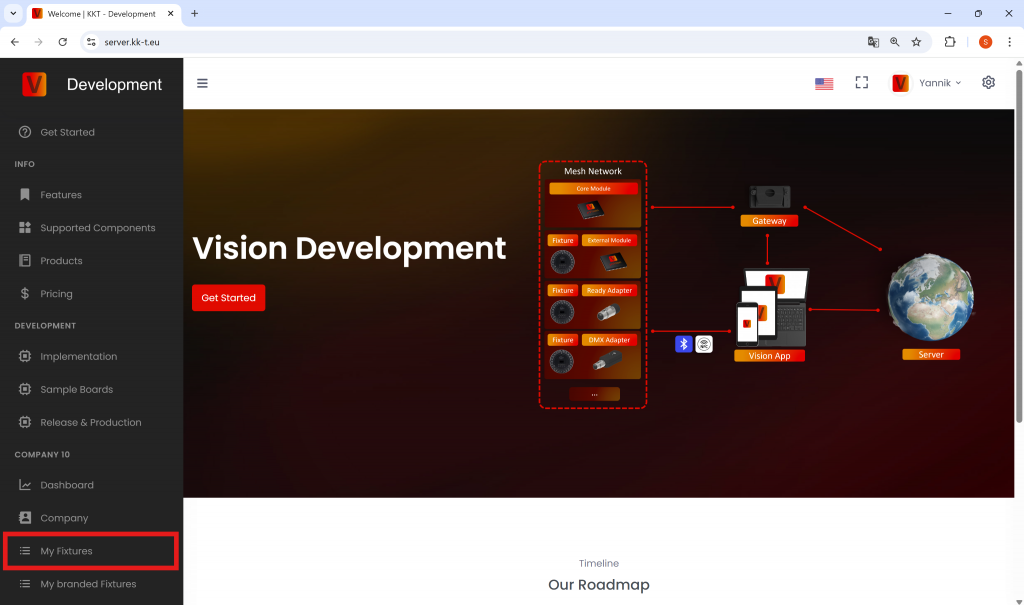
Log in to the Vision Web Service, open your company, and go to My Fixtures.
Create the fixture
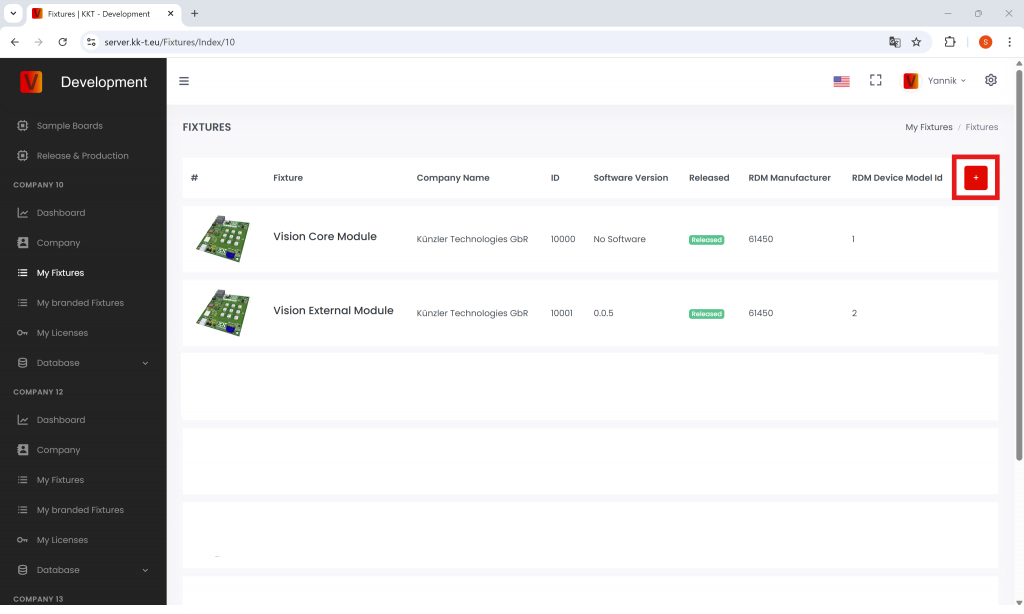
Click the plus button to create a new fixture. Fill in the product identity carefully.
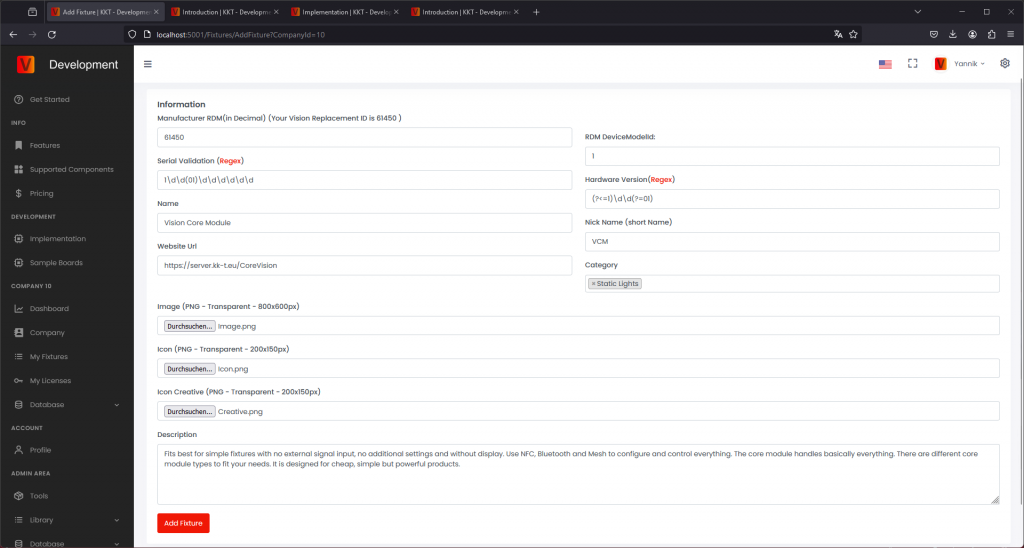
- RDM ESTA Manufacturer ID: enter the decimal value. If your value is written in hexadecimal, convert it to decimal first. If neither you nor the customer company has an RDM Manufacturer ID, request one from the official RDM website before release: https://www.rdmprotocol.org/rdm/developers/manufacturer-ids/
- RDM Device Model ID: enter the decimal value of the fixture model ID. If your value is written in hexadecimal, convert it to decimal first.
- Serial number validation: enter the regular expression used to validate fixture serial numbers. If there are no special requirements, use the simple numeric format already recommended by Vision Control.
- Product information: add the user-facing name, brand, description, website, and support information.
Add image and icons
The fixture image, fixture icon, and App Control icon are shown or used by the app. Prepare them carefully so the product is easy to recognize and the controllable light area is displayed correctly.
- Fixture image: upload a clear product image.
- Format: 800 x 600 px.
- Use a transparent background.
- Show the fixture without active light output.
- Keep at least 12% safety margin on the left and right side. For 800 px width, this is at least 96 px per side.
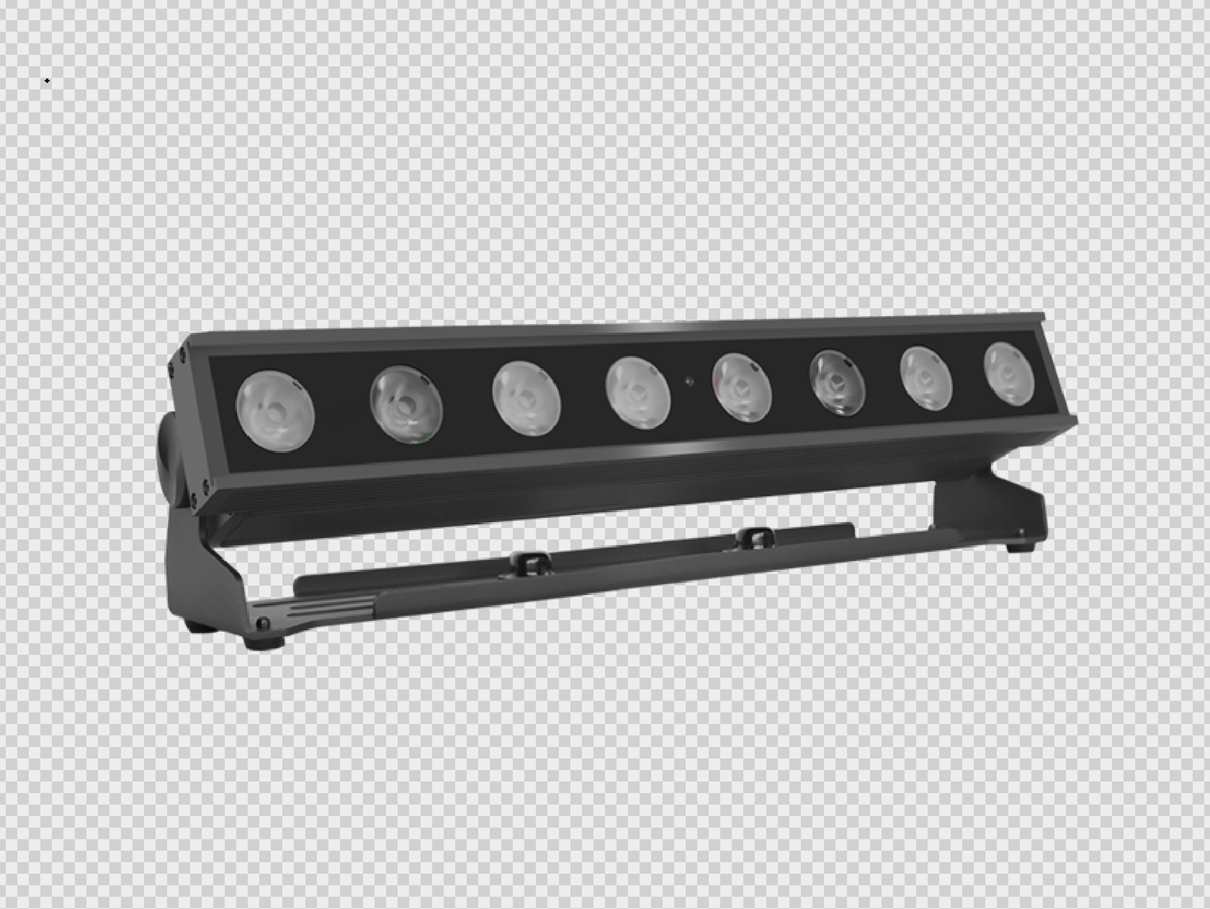
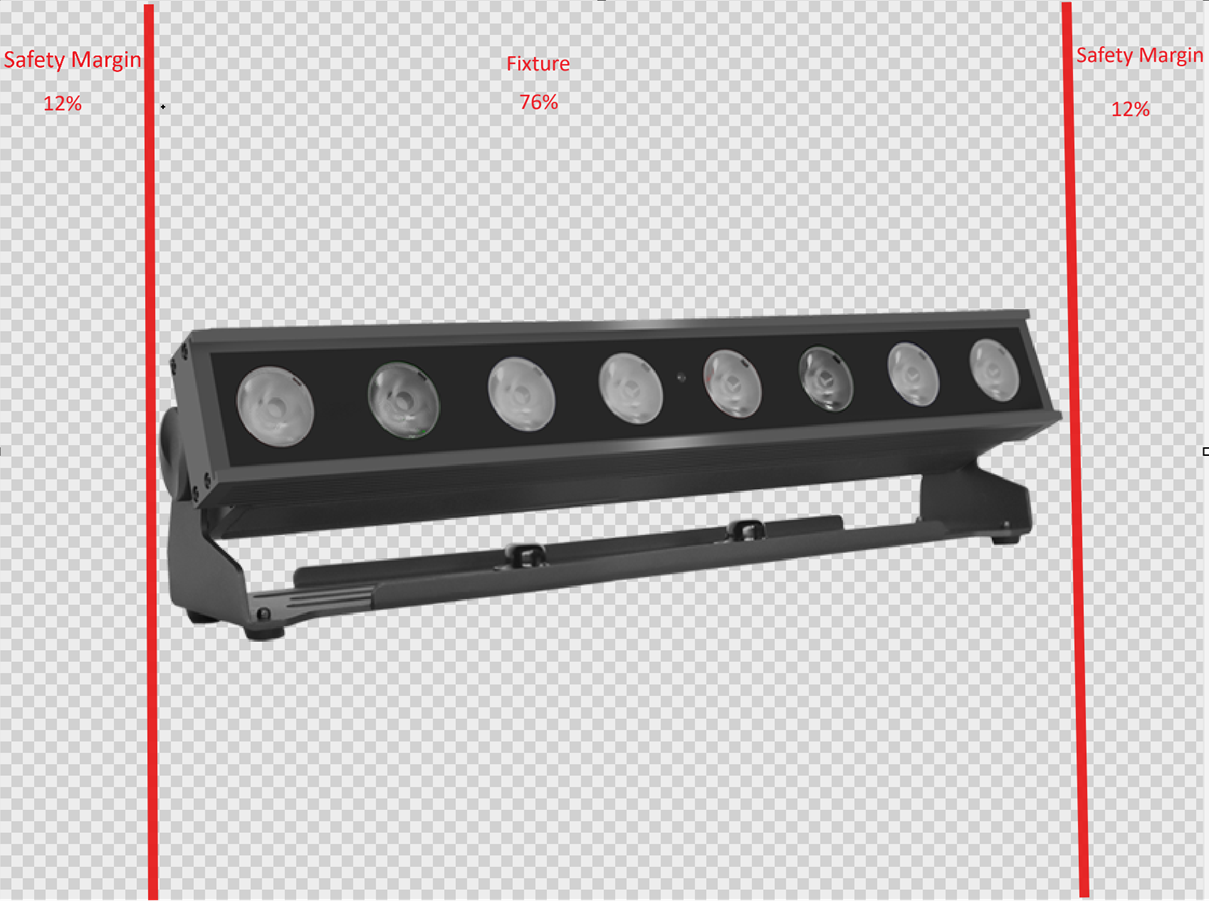
- Fixture icon: upload the same product view in lower resolution.
- Format: 200 x 150 px.
- Use a transparent background.
- Show the fixture without active light output.
- Keep at least 12% safety margin on the left and right side. For 200 px width, this is at least 24 px per side.
- App Control icon: mark the controllable light area. Older pages or screenshots may call this Icon Creative.
- Format: 200 x 150 px.
- Use a transparent background.
- Use white for the area where the fixture can emit light. The white area should use about 60% opacity, as shown in the example.
- The app uses this icon to define and display the illumination area correctly.
- If the fixture has no light-output component, upload a fully transparent image.

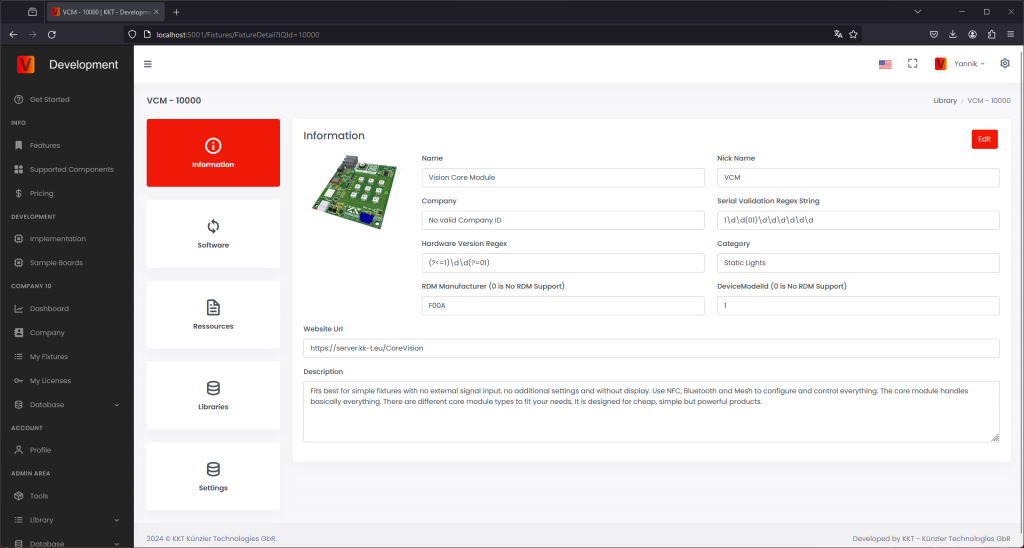
After saving, the fixture appears on the My Fixtures page. New fixtures are created as draft and are not released to normal users yet.
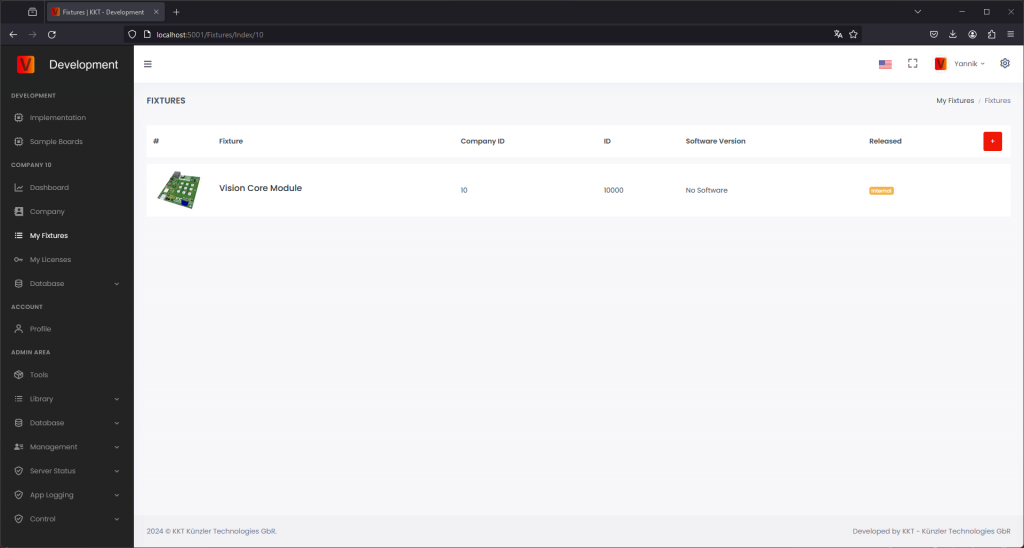
Click the product again to review the entered information. As long as the fixture is not released, you can still modify the values.
Upload firmware
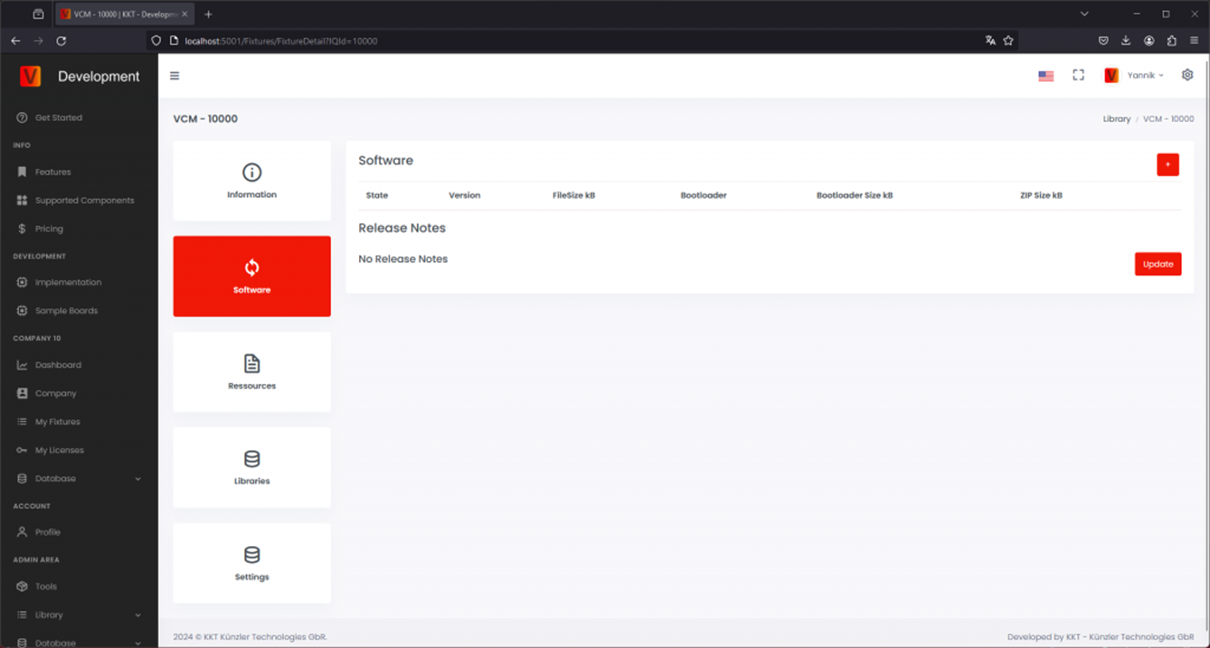
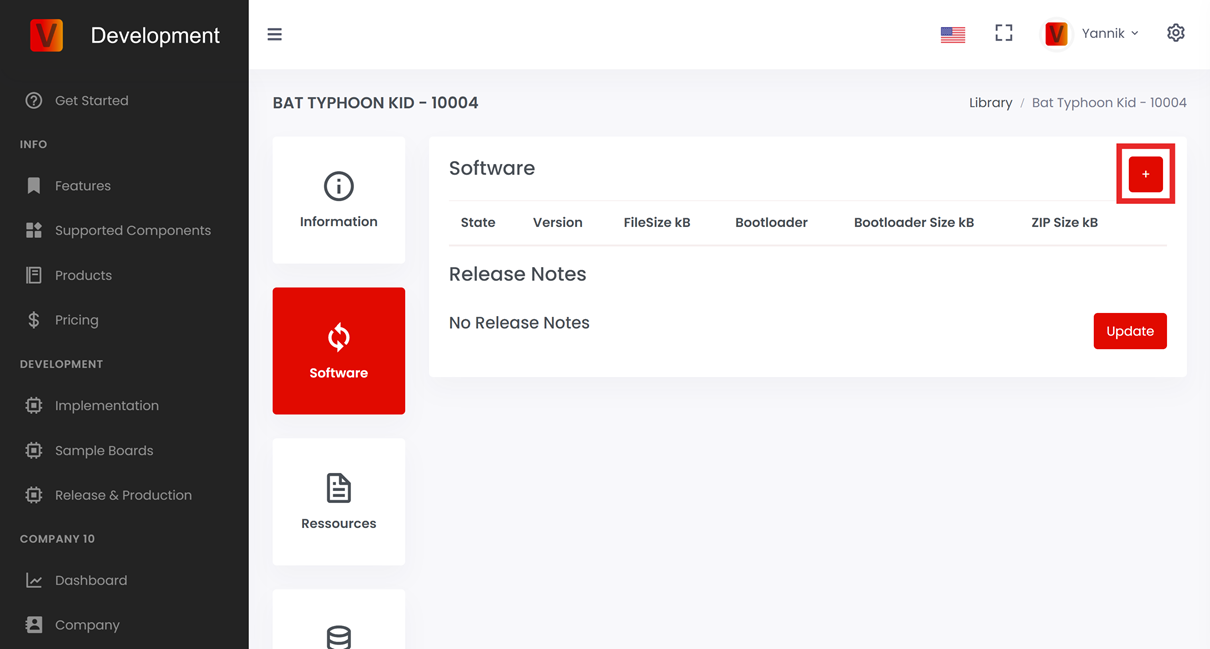
Open the Software section and upload the firmware file for the fixture. Add clear release notes so the customer can understand what changed.
- Use the versioning format expected by the Vision Web Service.
- Only release firmware that was tested on the real fixture.
- Keep draft firmware internal until it is ready for release.
When the firmware is ready for users, change it from draft to release.
Upload resources
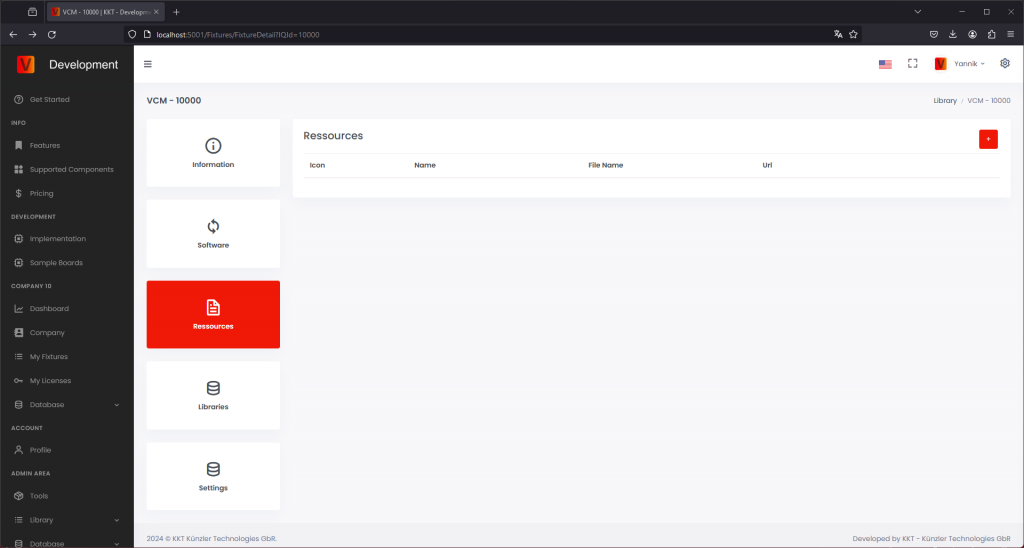
Upload customer-facing documents in the resources area. Typical resources are the user manual, DMX sheet, safety information, technical specification, or service documents.
Upload App Control Configuration
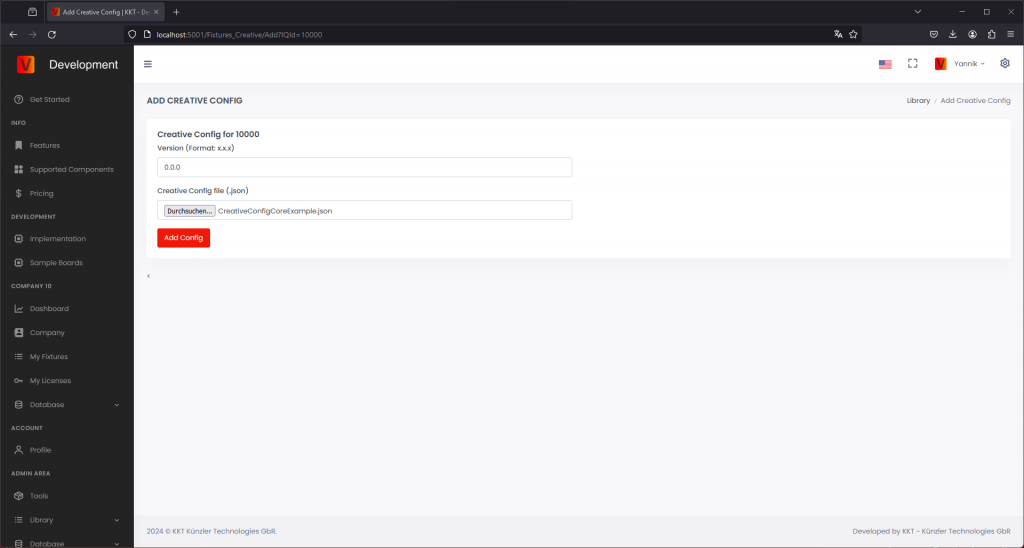
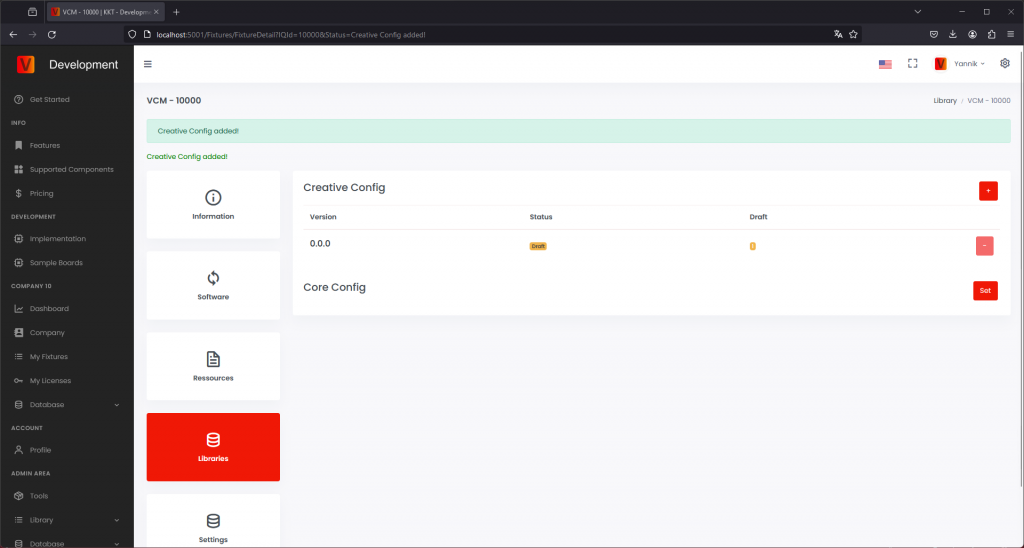
Upload the final App Control Configuration created and tested during implementation. This configuration must match the final firmware behavior. If the firmware behavior changes, check whether the App Control Configuration must also be updated.
Legacy naming: App Control Configuration was previously called Creative Configuration or Creative Config in older app versions, screenshots, URLs, and filenames.
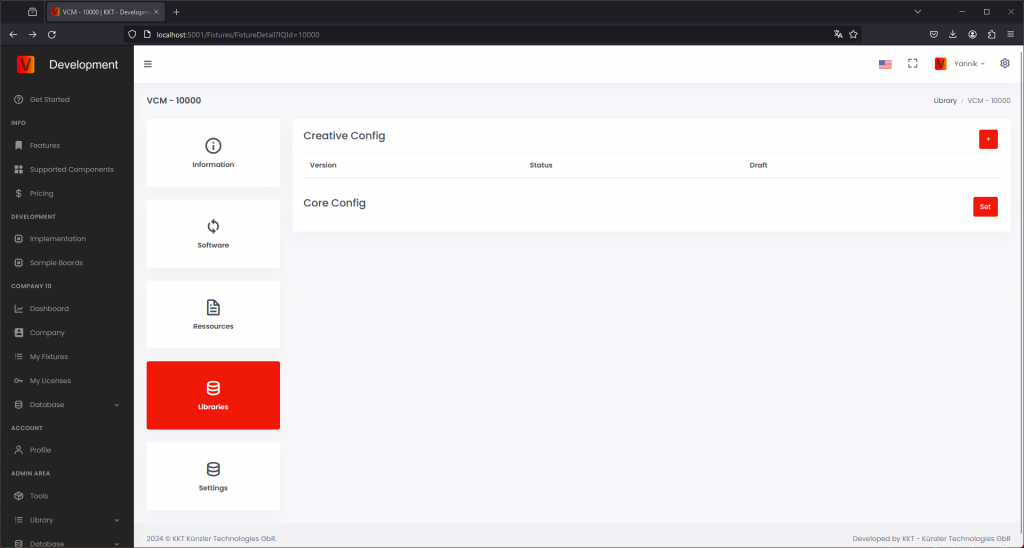
If several firmware versions use the same configuration, they can reference the same App Control Configuration. If a new firmware changes the DMX layout or App Control behavior, upload a new configuration and assign it to the matching firmware version.
Create & Upload DMX Configuration (optional)
Create DMX Configuration
Create a .csv file for each DMX Personality (DMX Mode). You can first create the file in Excel and then convert it to a .csv file. Make sure all values are separated by a semicolon ; instead of a comma ,.
Refer to the user manual of the fixture to check the DMX channel layout.
Example: The following is an example of a DMX channel layout.
- Intensity (coarse)
- Intensity (fine)
- Shutter
- Red (coarse)
- Red (fine)
- Green (coarse)
- Green (fine)
- Blue (fine)
- Blue (coarse)
The result is shown in the example .csv files below, with the following columns:
- No: Number the channels, starting from 1.
- Name: Enter a name for the channel, such as Shutter, Red, etc.
- Bit16:
- Set to False for an 8-bit channel, for example Shutter.
- Set to True for a 16-bit channel, for example Intensity, Red, Green, and Blue.
- When this setting is enabled, the in-app control uses a single slider with a range of 0 to 65,535 instead of two separate sliders with ranges of 0 to 255.
If you prefer separate coarse and fine controls, that is also supported. In that case, set this option to False and create two rows.
However, we recommend setting it to True, because a single slider provides a simpler and more intuitive control experience.
- StandardValue: In most cases, set this to 0.
Below are two example .csv files for the same layout above. The first example uses Bit16 set to False, resulting in two separate sliders for the coarse and fine values. The second example uses Bit16 set to True, resulting in a single slider for each 16-bit value.
Upload DMX Configuration
Navigate to Libraries and click the plus icon next to DMX Config to add a new DMX Config.
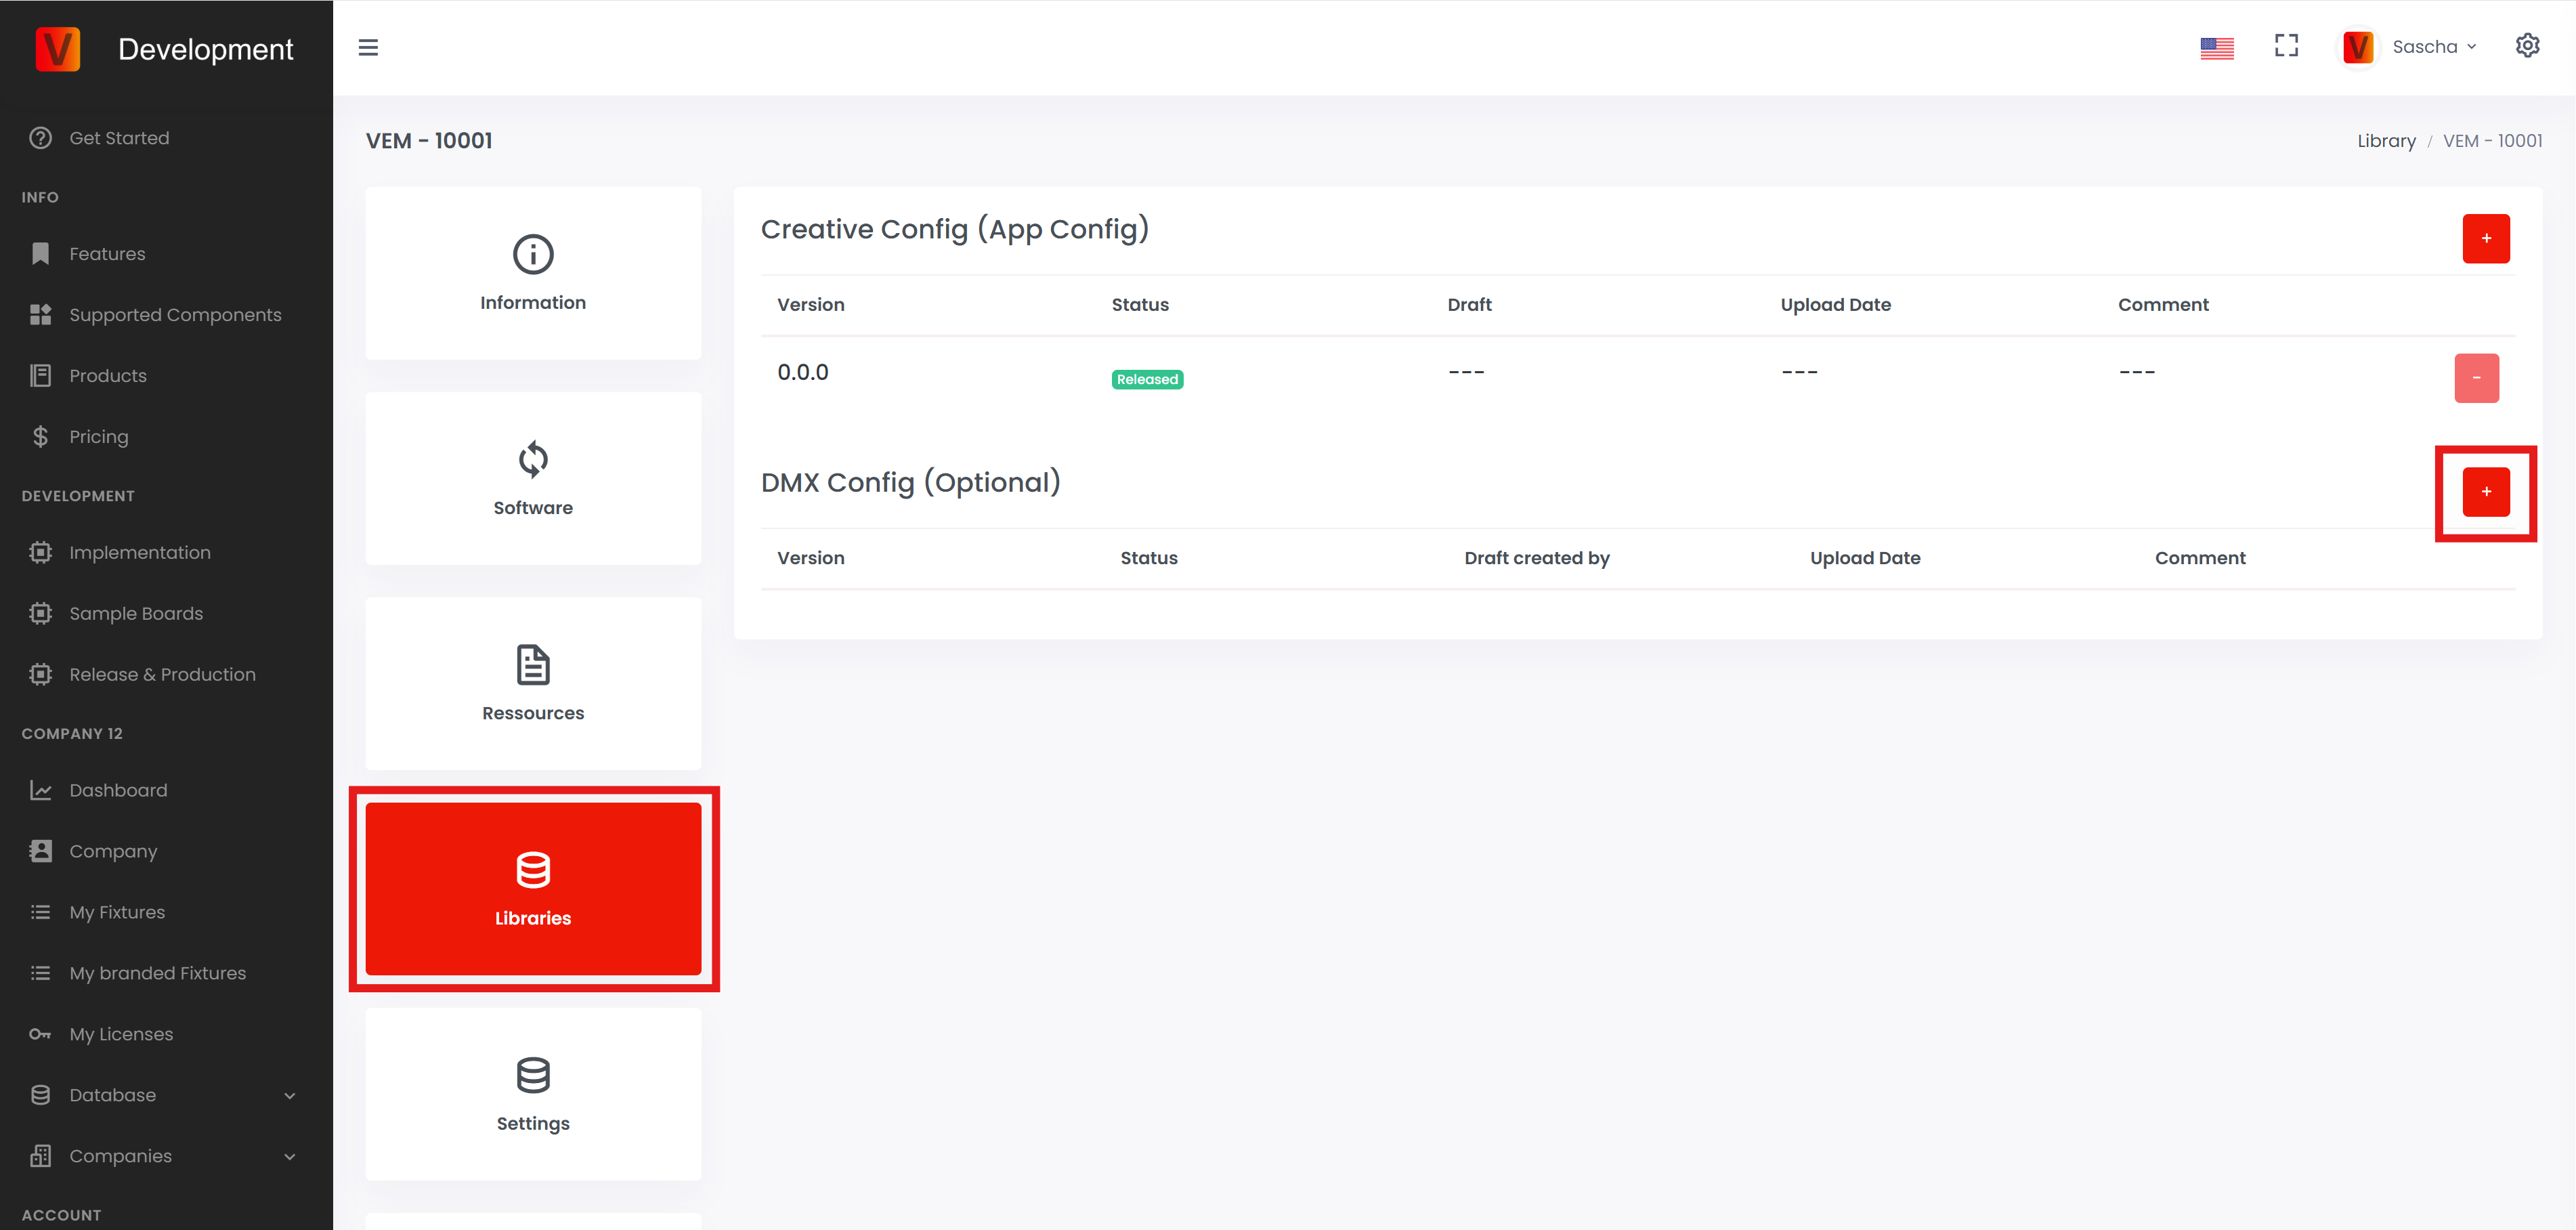
Enter the minimum fixture firmware version for this DMX config. This feature allows you to have different DMX configs for different firmware versions. If you enter 0.0.0, the DMX config will be available for all firmware versions until a newer DMX config with a higher minimum version is published.
Add a name for each DMX Personality (DMX Mode) and select the matching .csv file. Once you have filled in all DMX Personality names for this fixture, click Add Config.
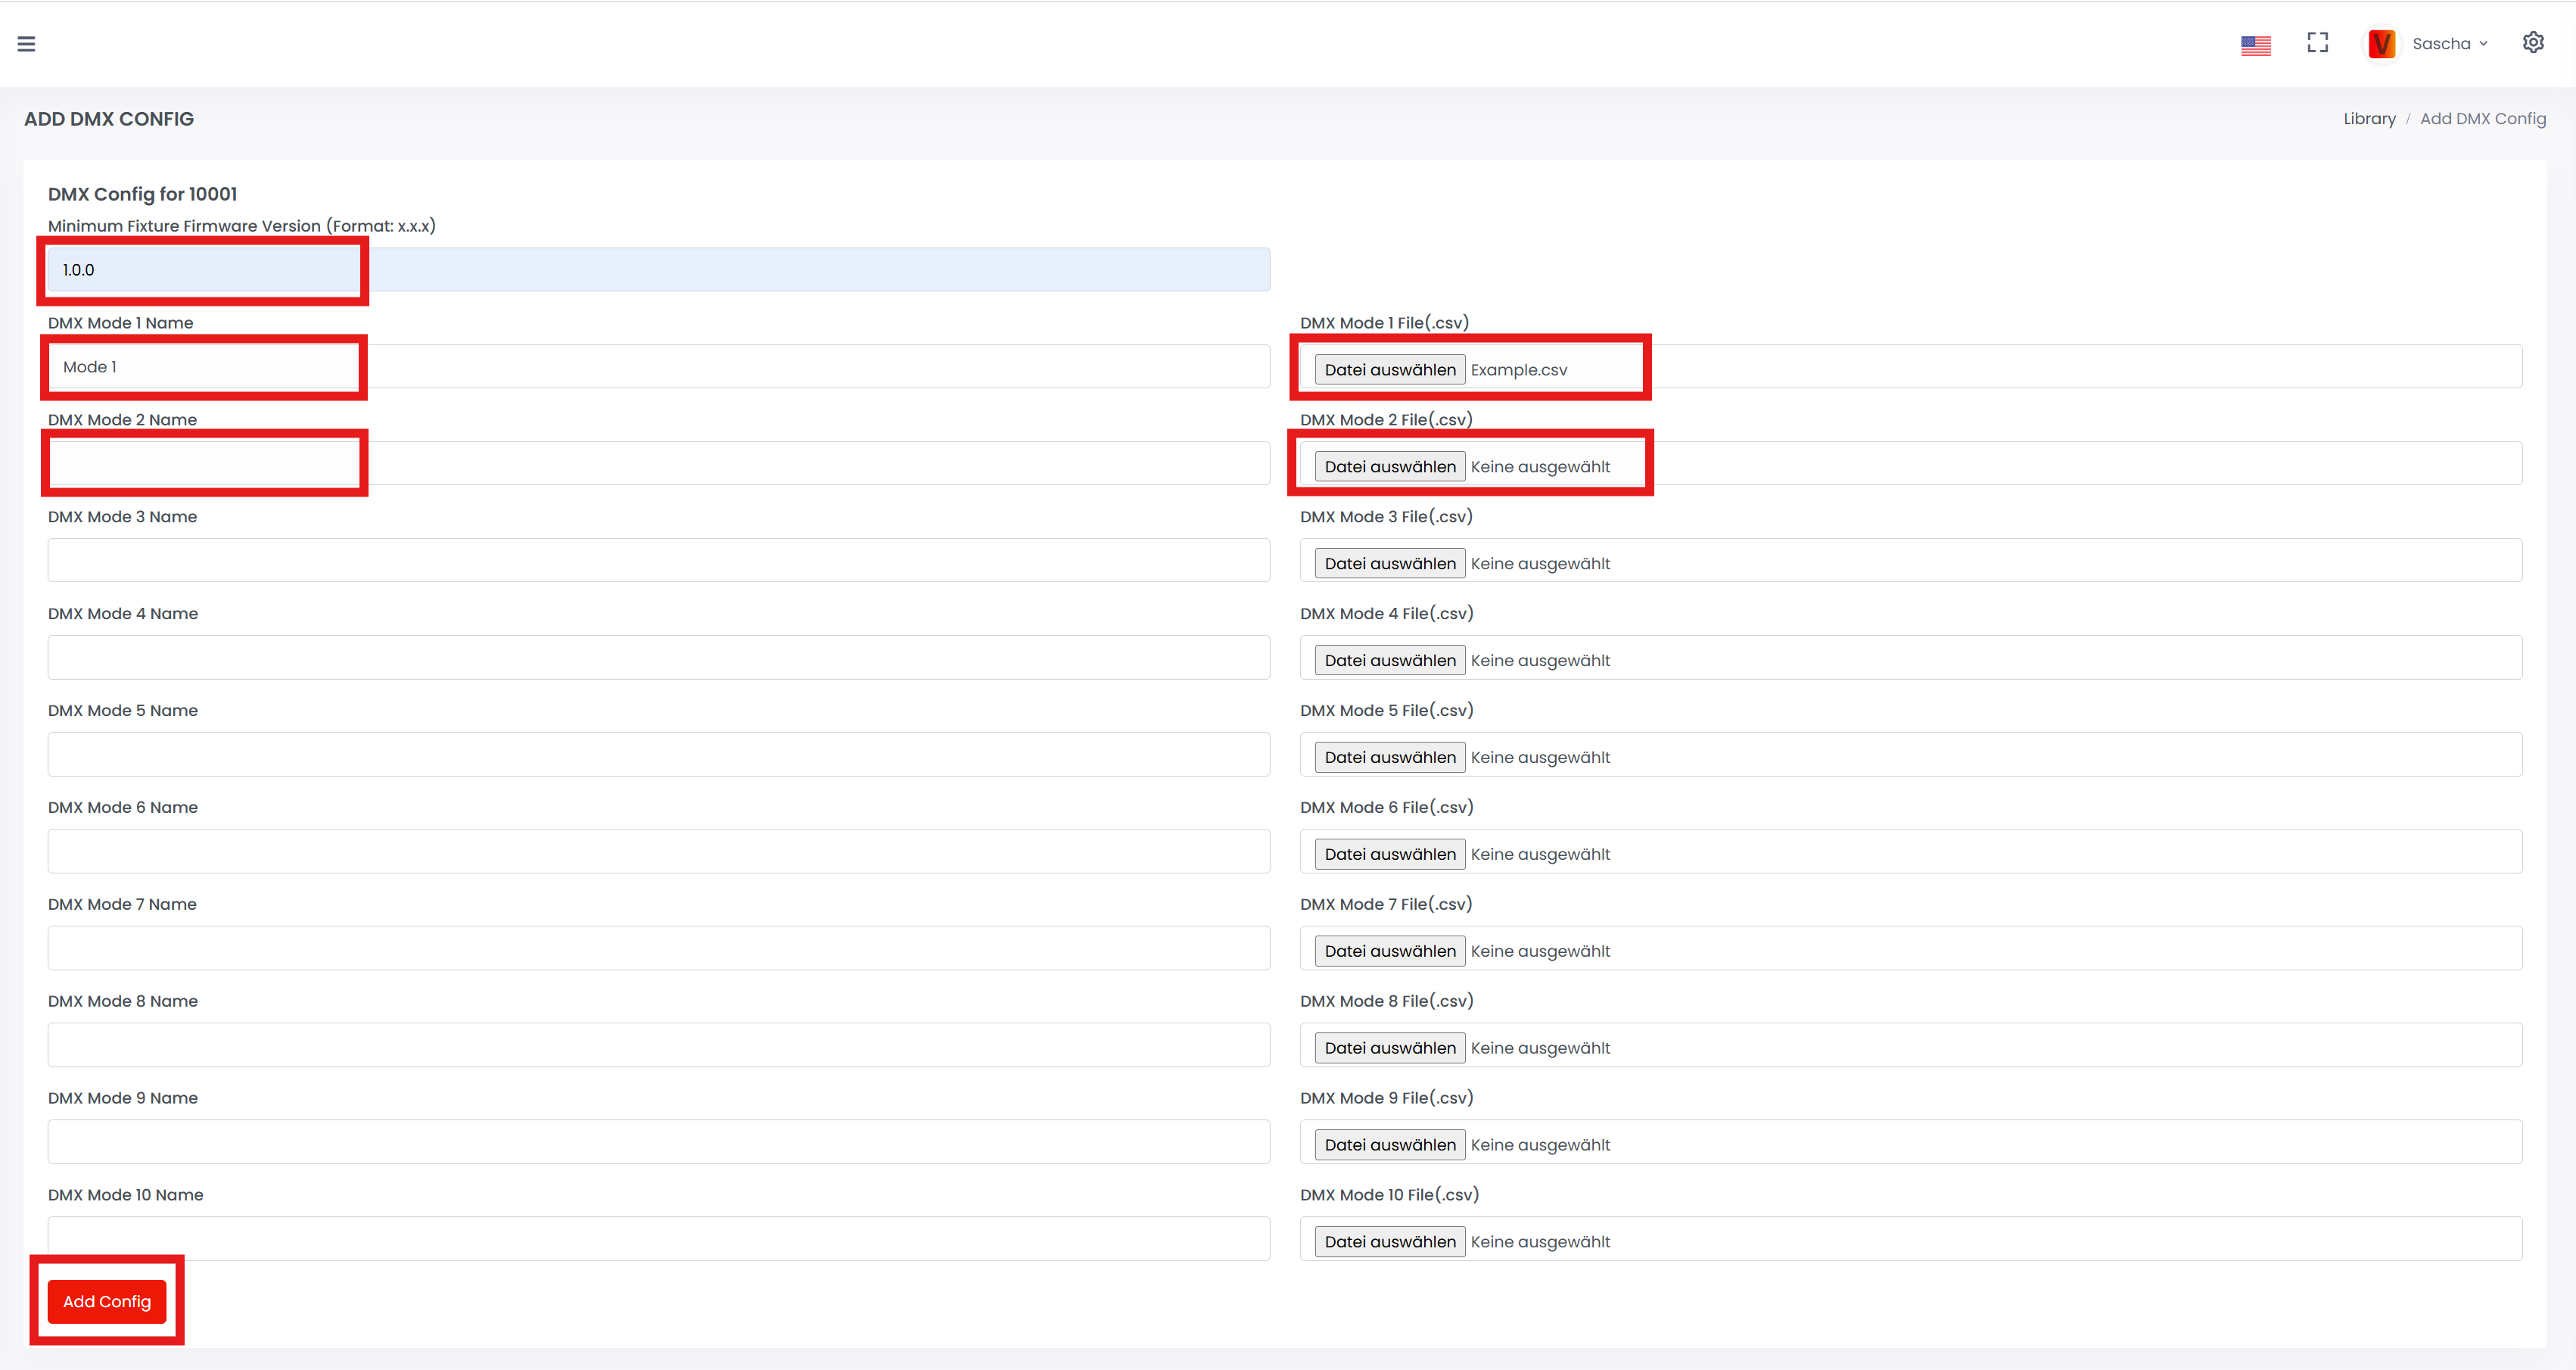
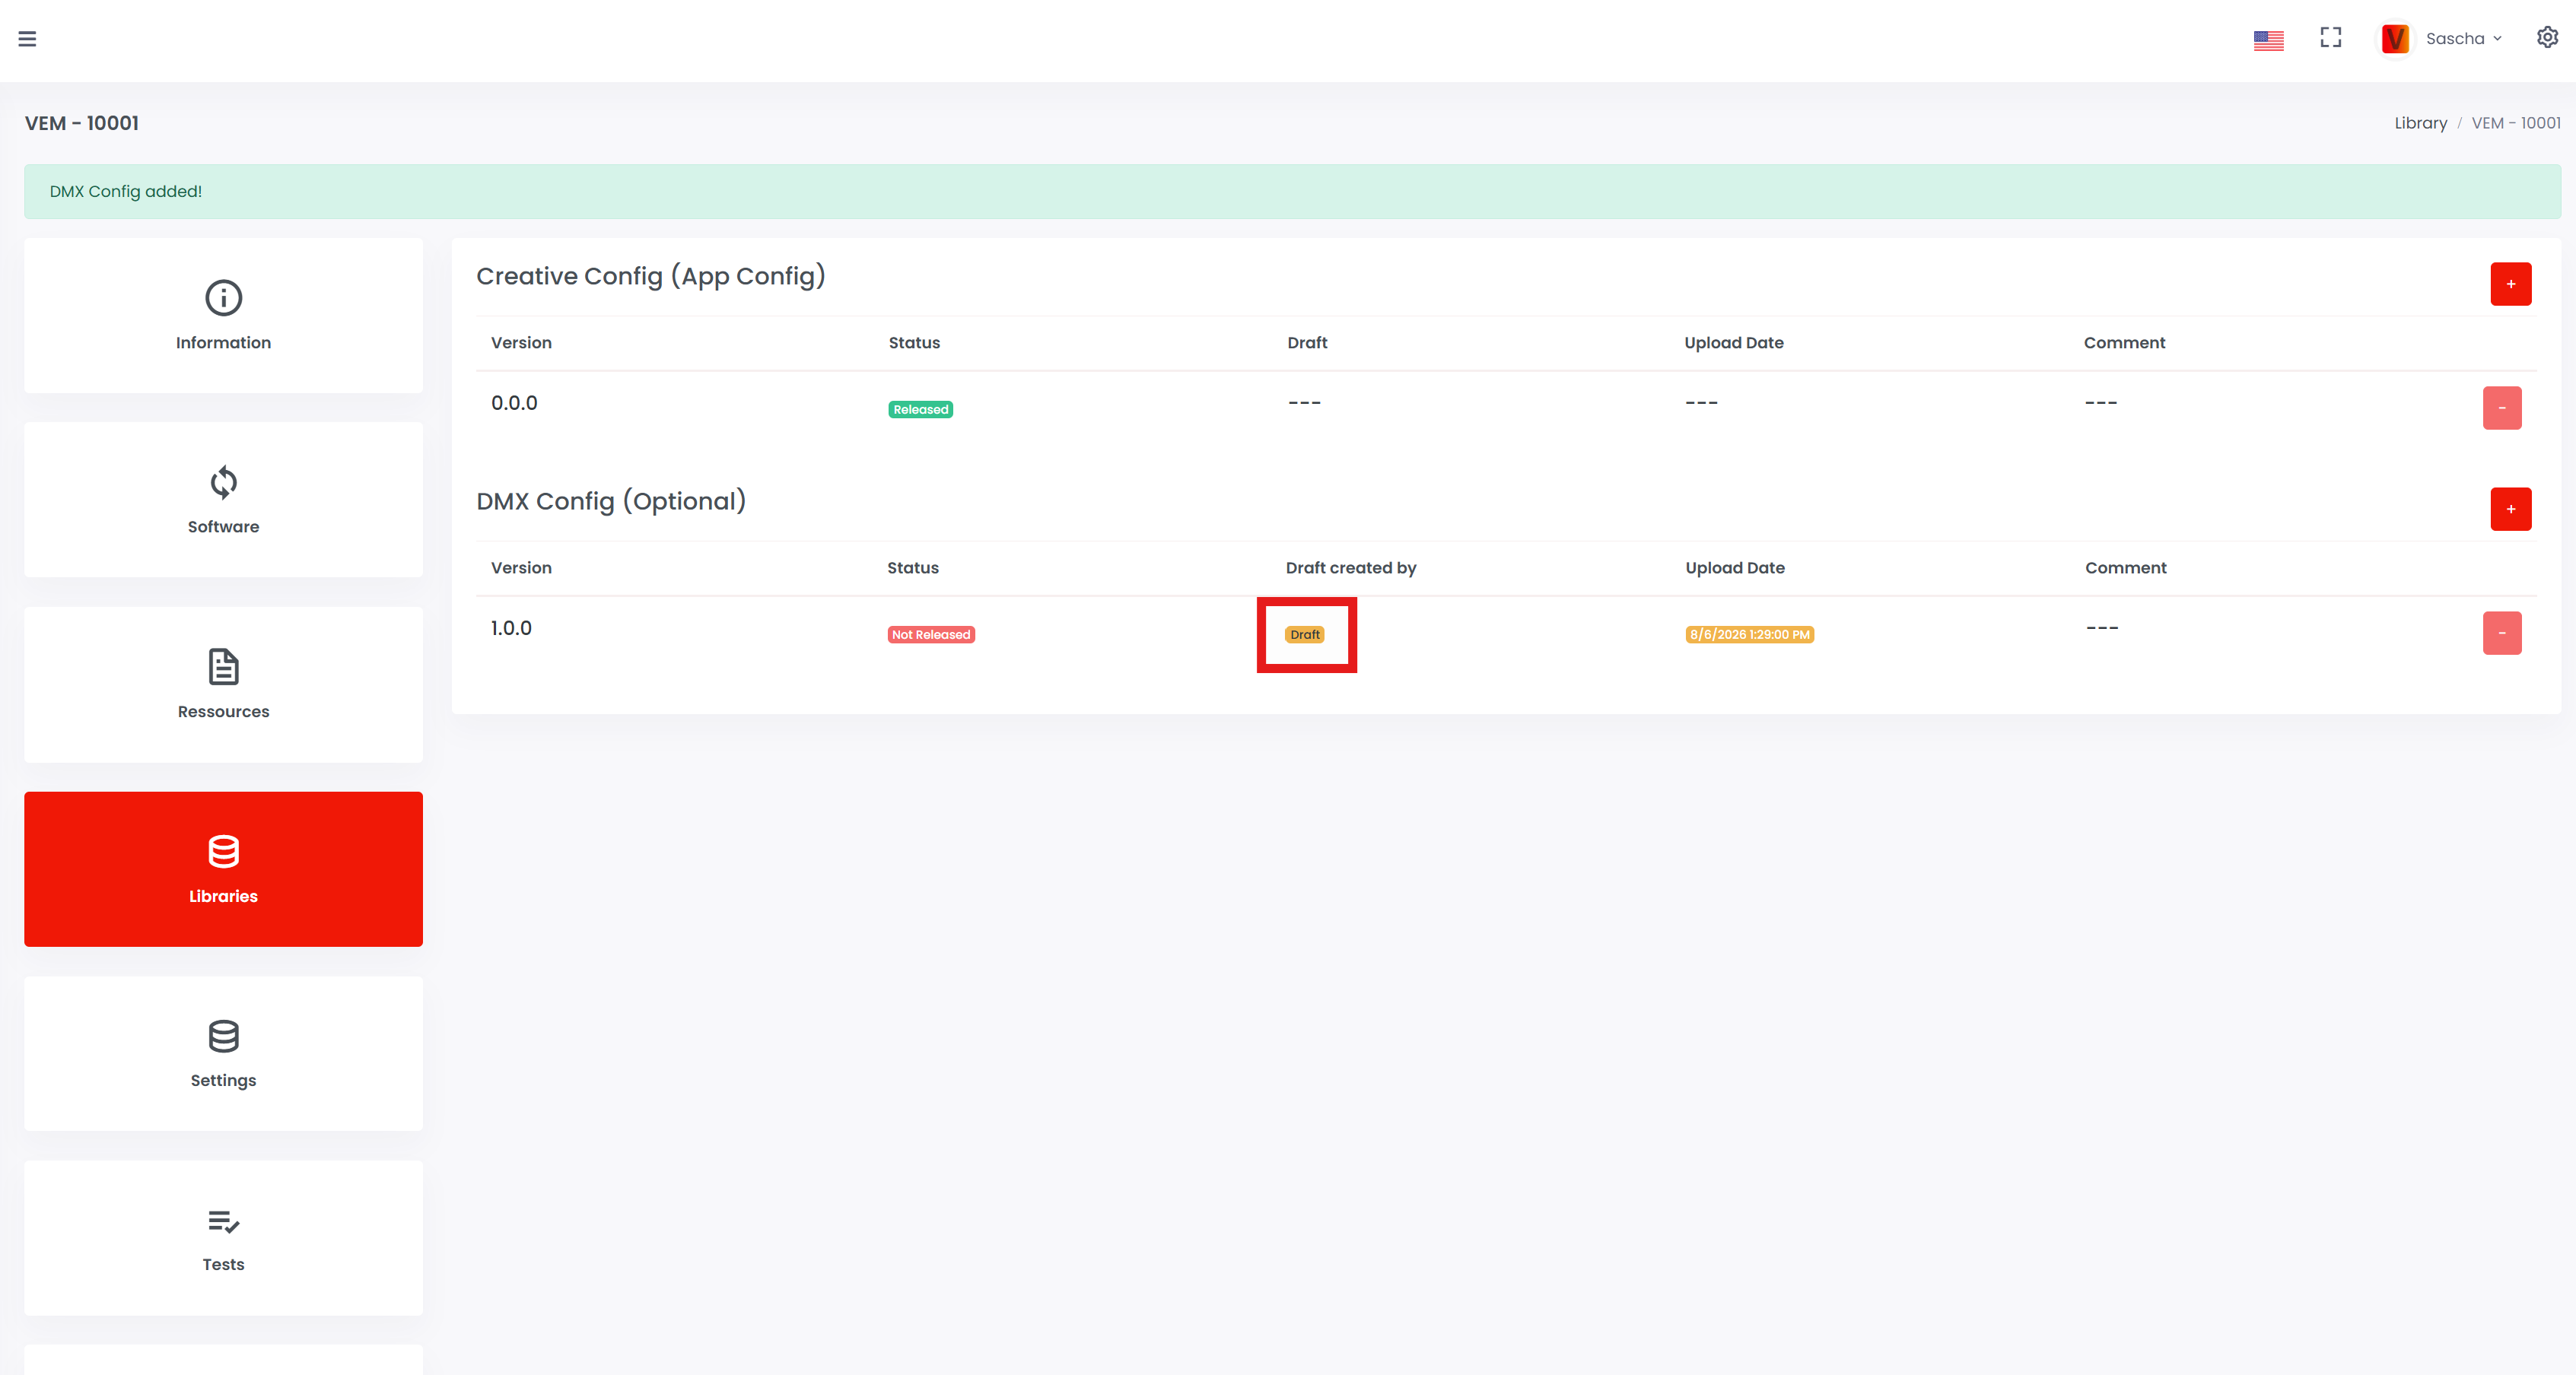
The config is saved as a draft. A draft is not available in the app. To release the DMX config to customers in the app, click Draft.
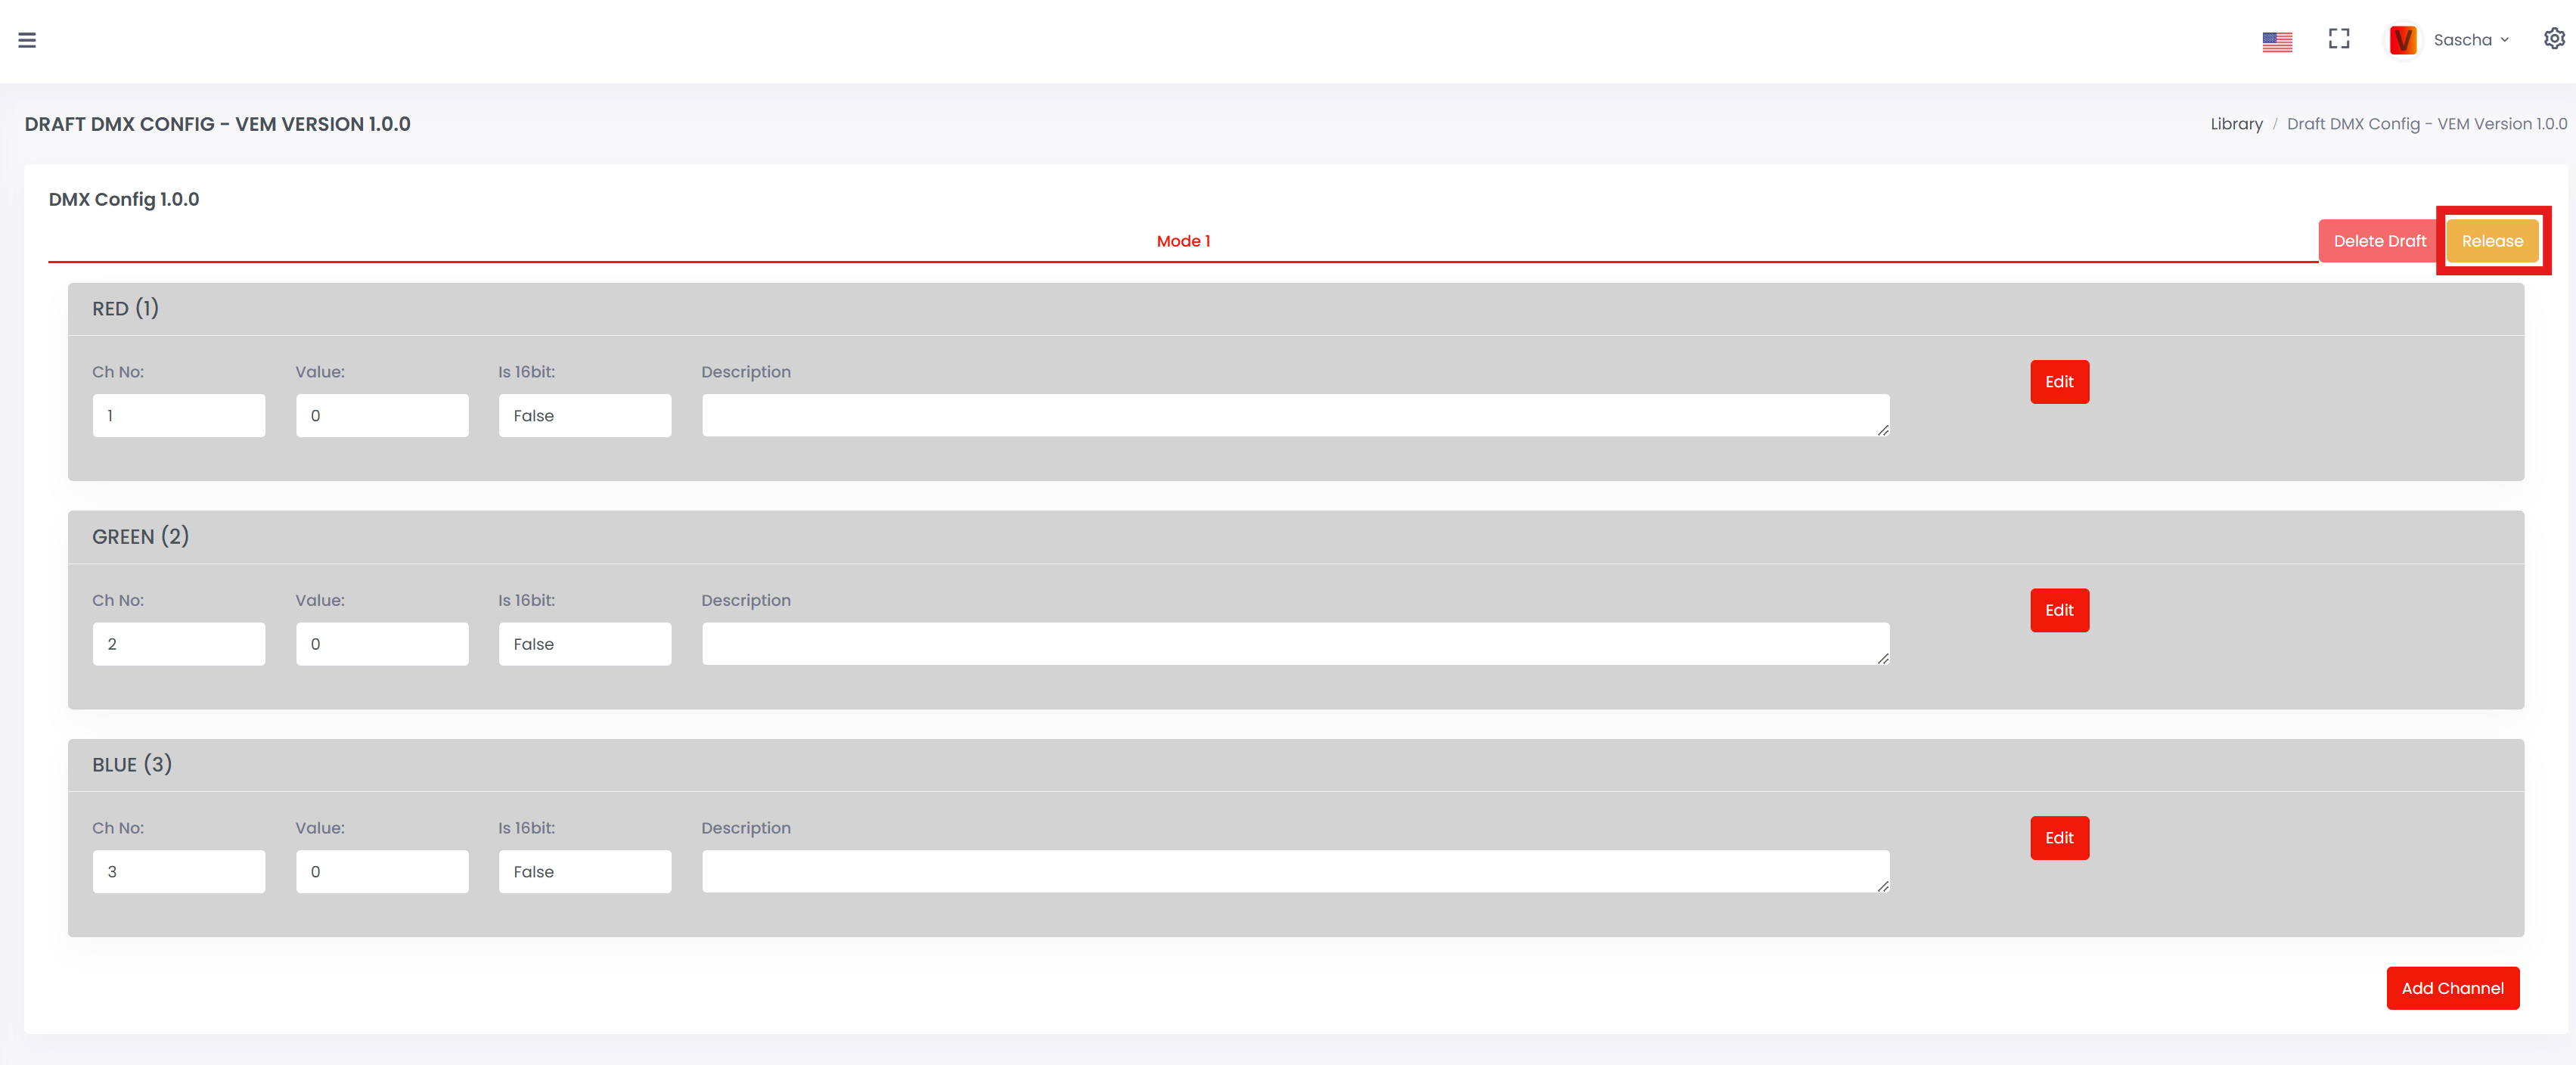
Click Release. A popup opens; click Release again to confirm.
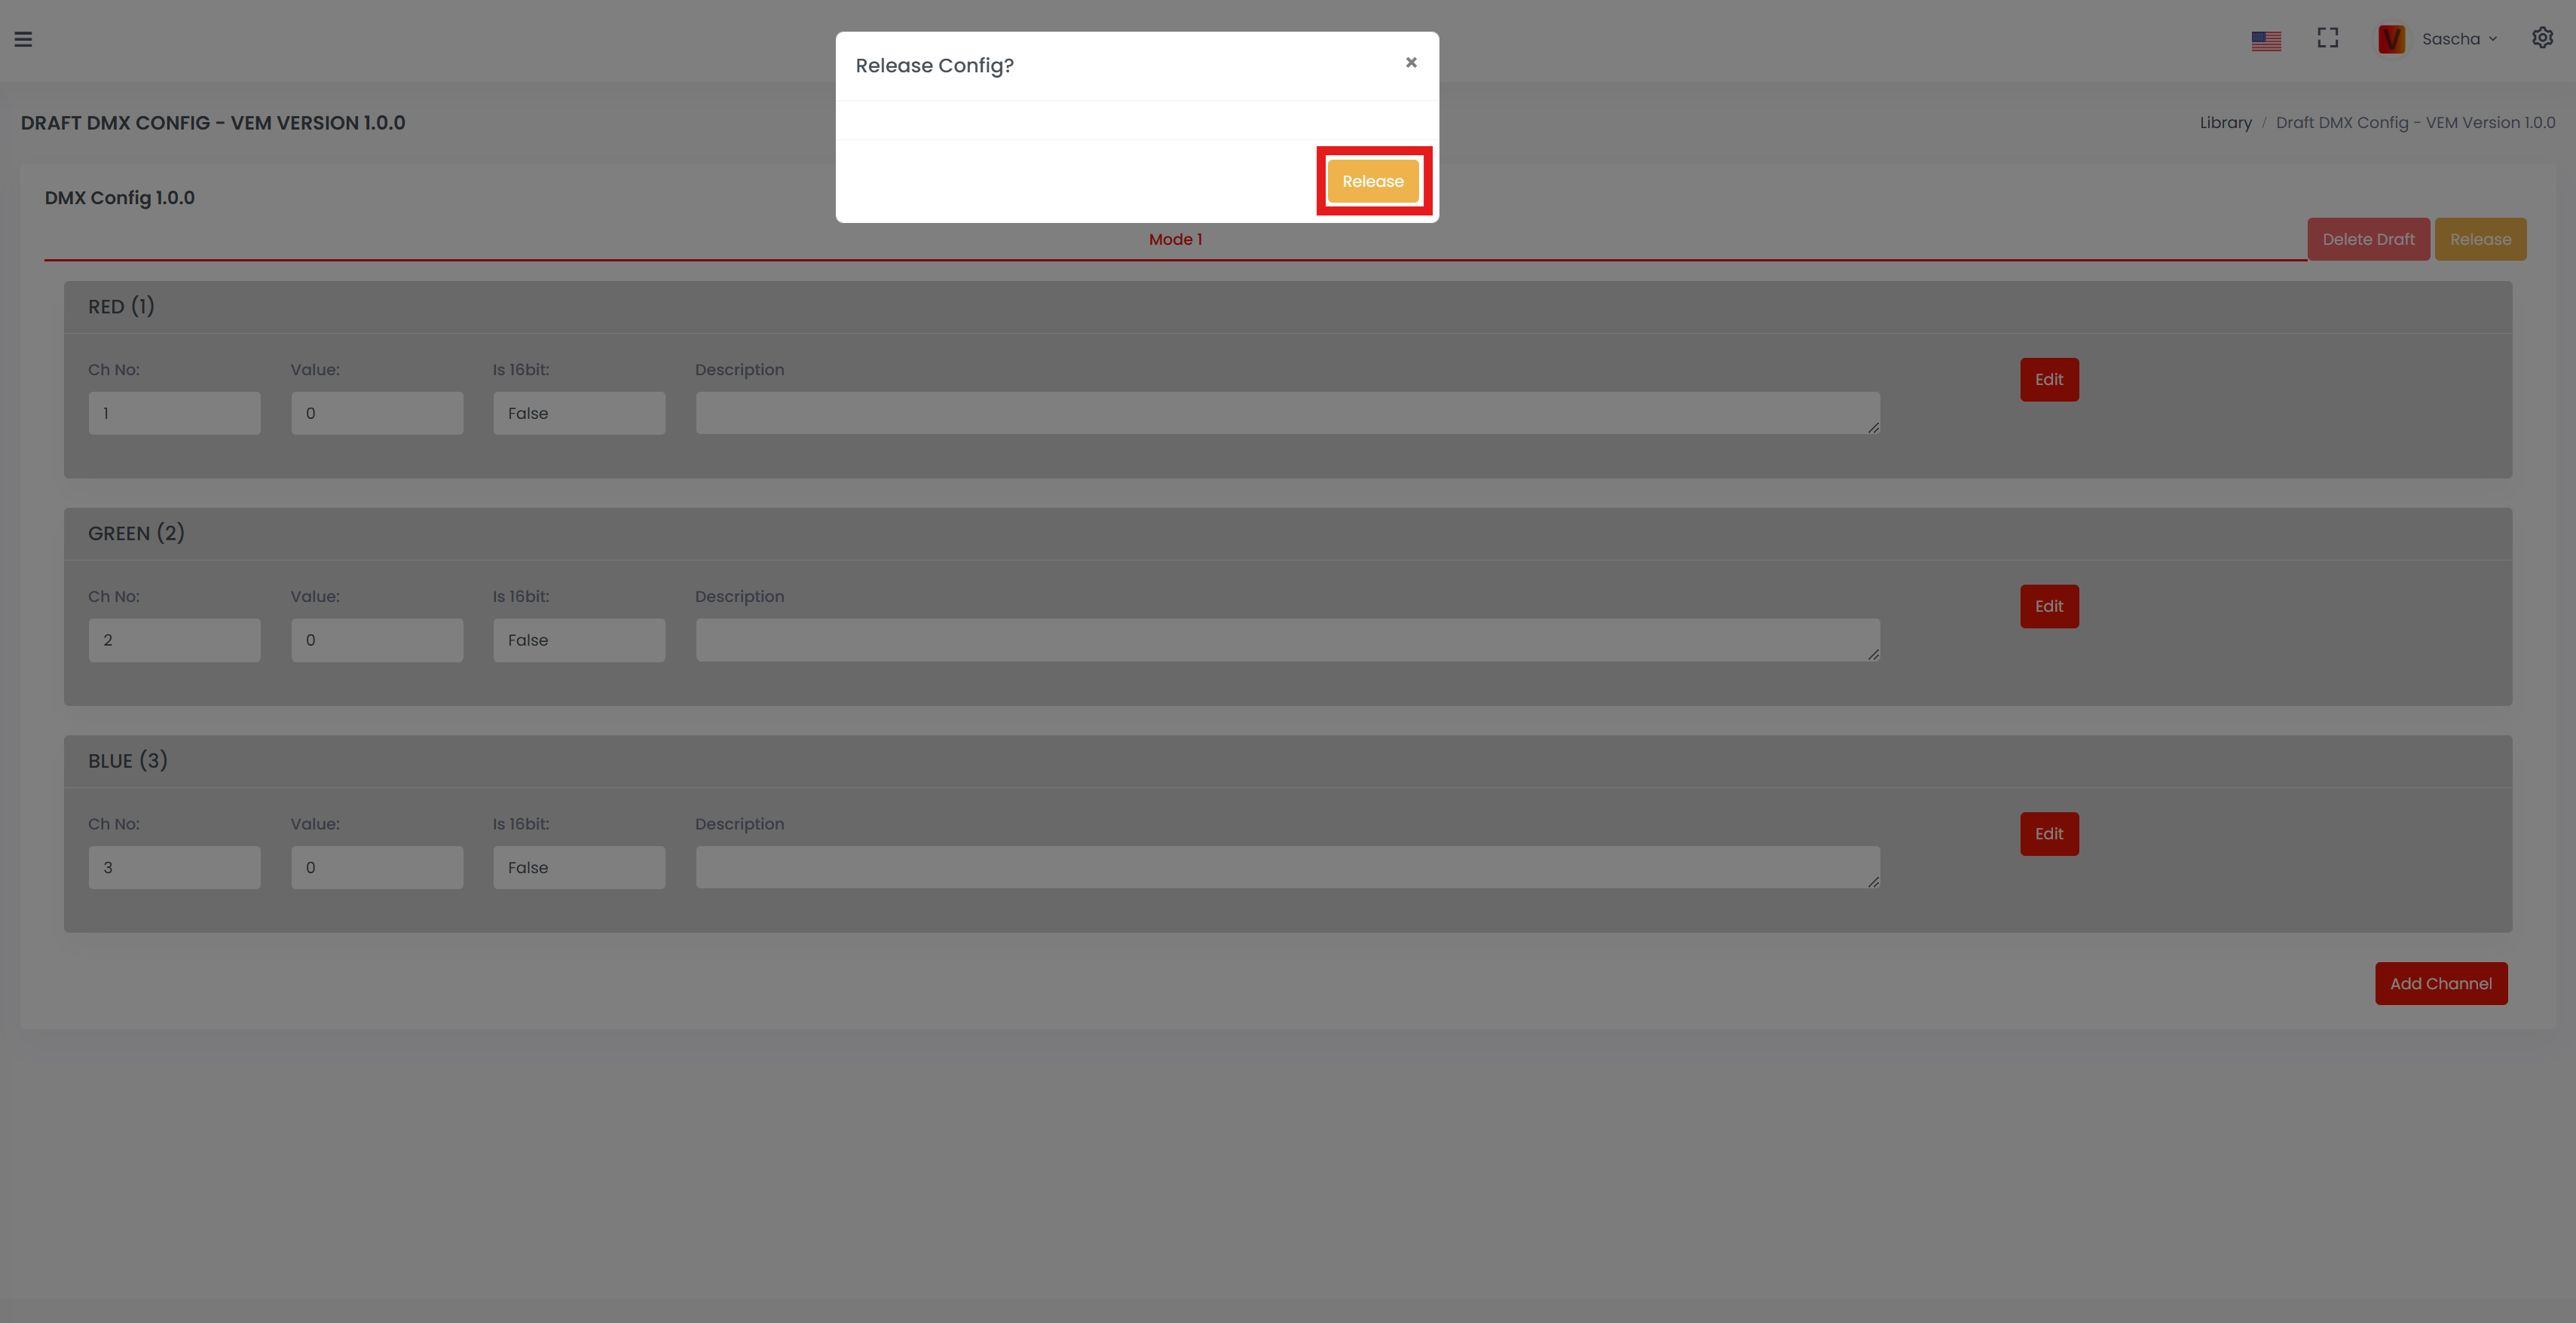
The DMX config is now released.
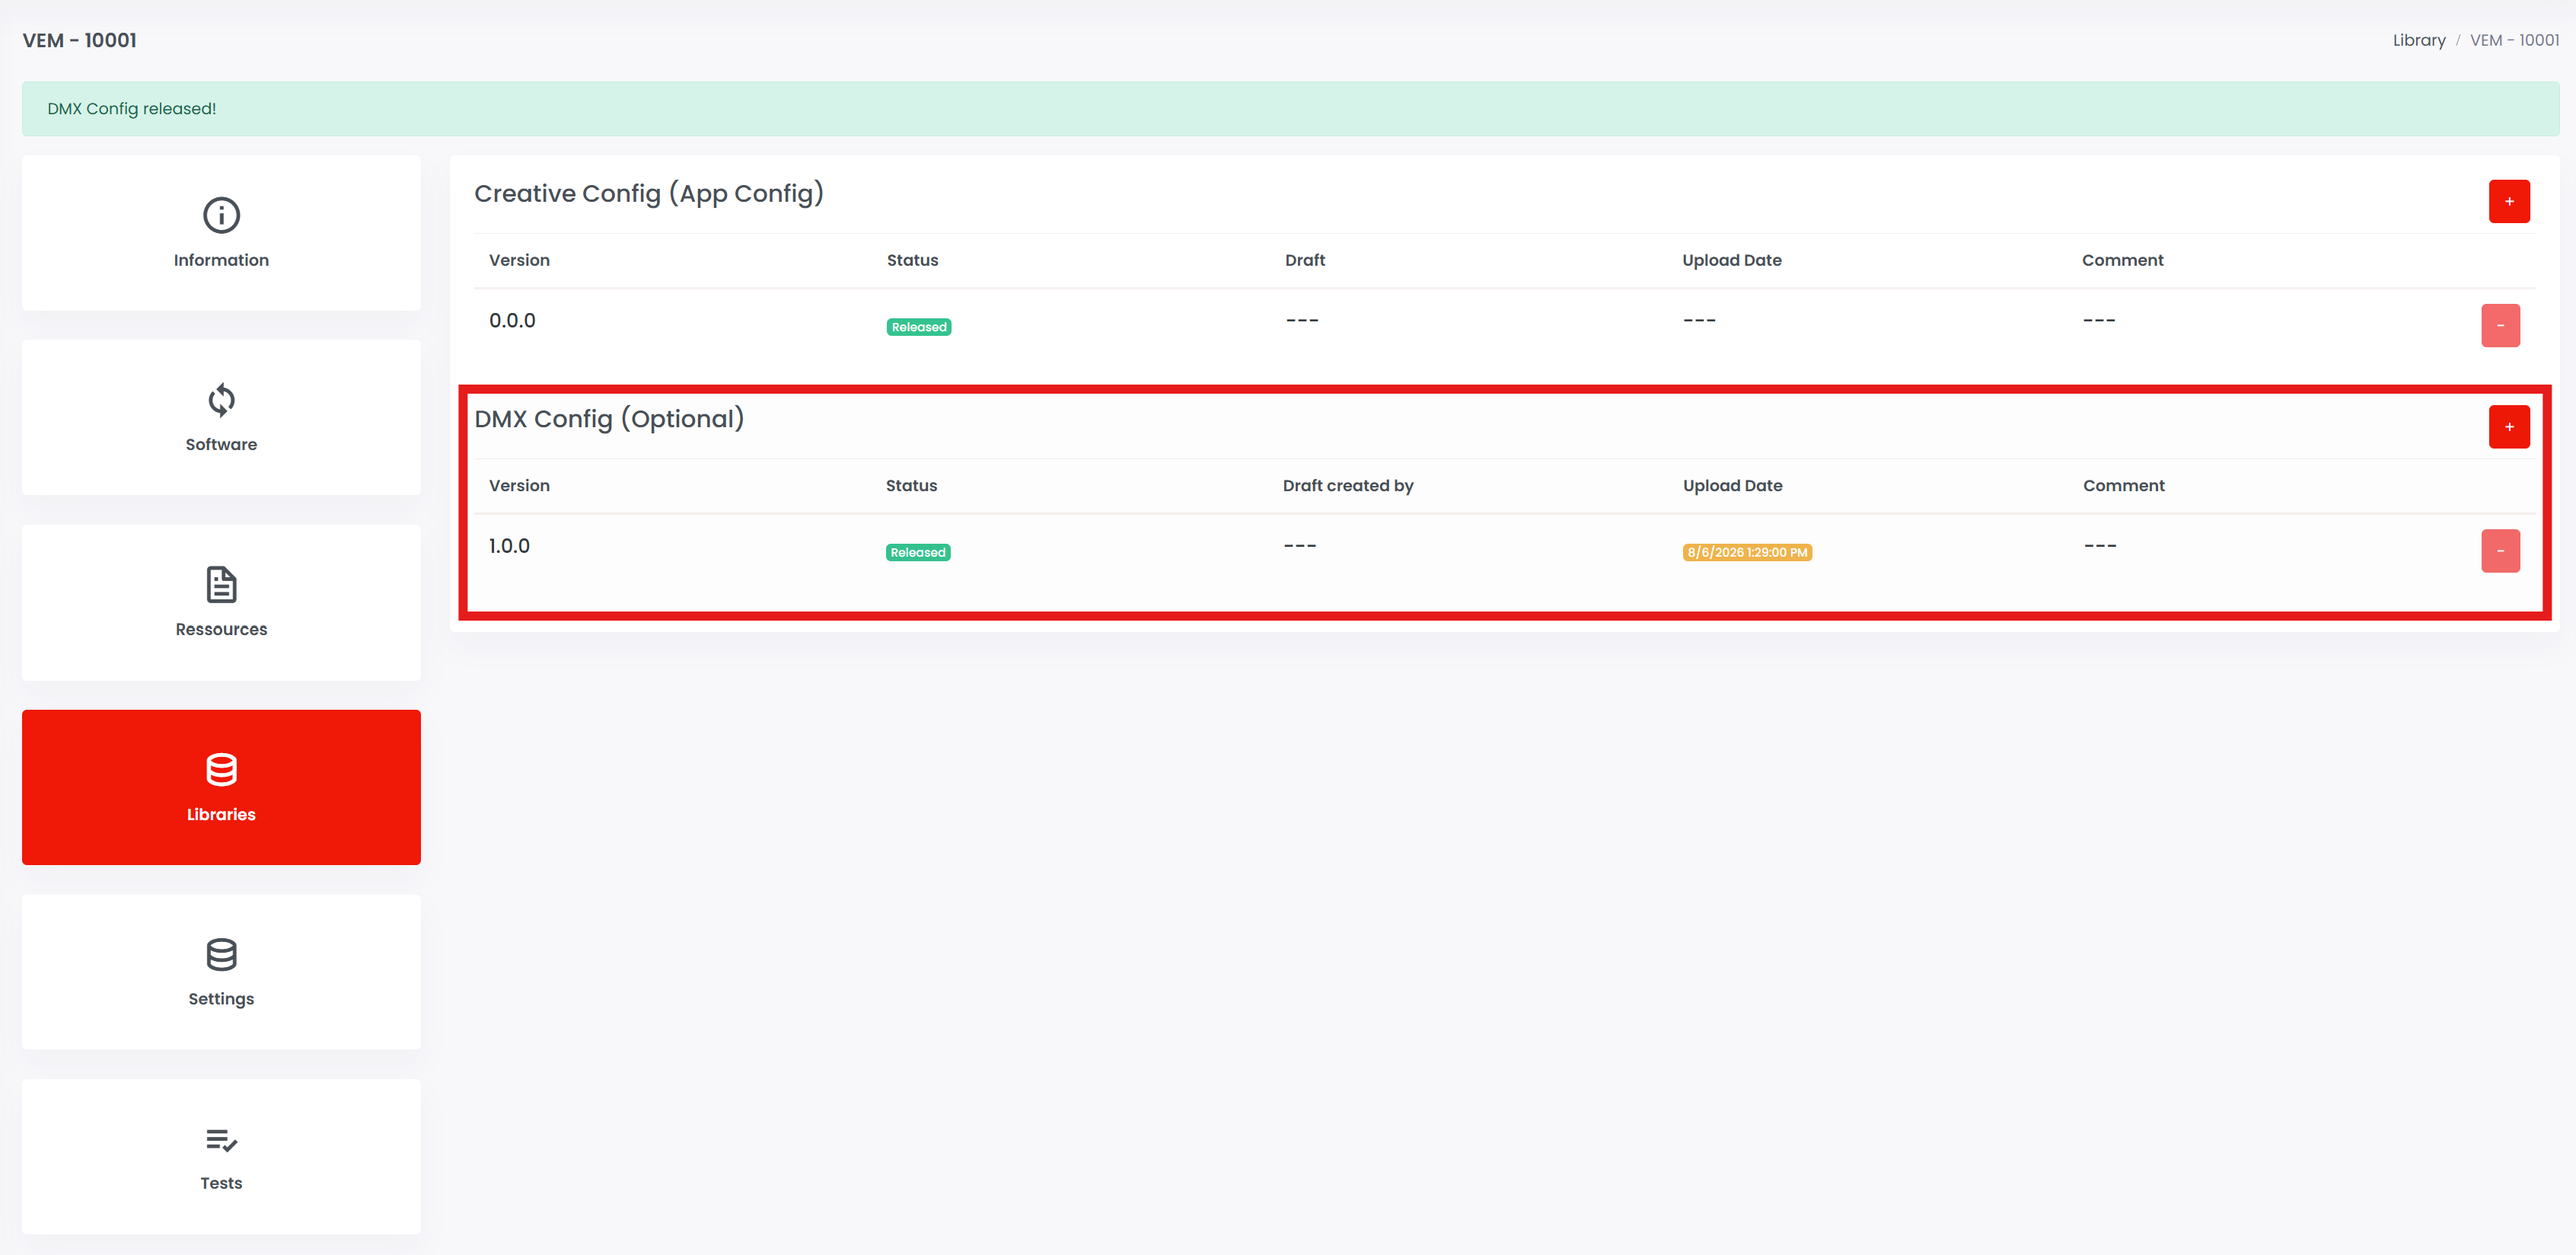
If an automatic Library Update popup appears in the app, the new DMX configuration is available. If the popup does not appear automatically, go to Settings - App Settings and click Refresh library.
Check release information
Before requesting the release, check all information that will be visible or used by the Vision Control App.
- Fixture name, brand, description, website, and support contact.
- RDM Manufacturer ID and RDM Device Model ID.
- Firmware version and release notes.
- App Control Configuration assigned to the correct firmware version.
- Fixture image, icon, and App Control icon.
- Resources such as manual, DMX chart, technical data sheet, or safety information.
The RDM Manufacturer ID and RDM Device Model ID cannot be changed after release. Other product information can be updated later, but it should still be checked carefully before release.
Request release
Request the fixture release only after the real fixture was tested with the final firmware, final App Control Configuration, and final product data. Upload the requested verification information and, if required, a video that demonstrates the fixture functionality.
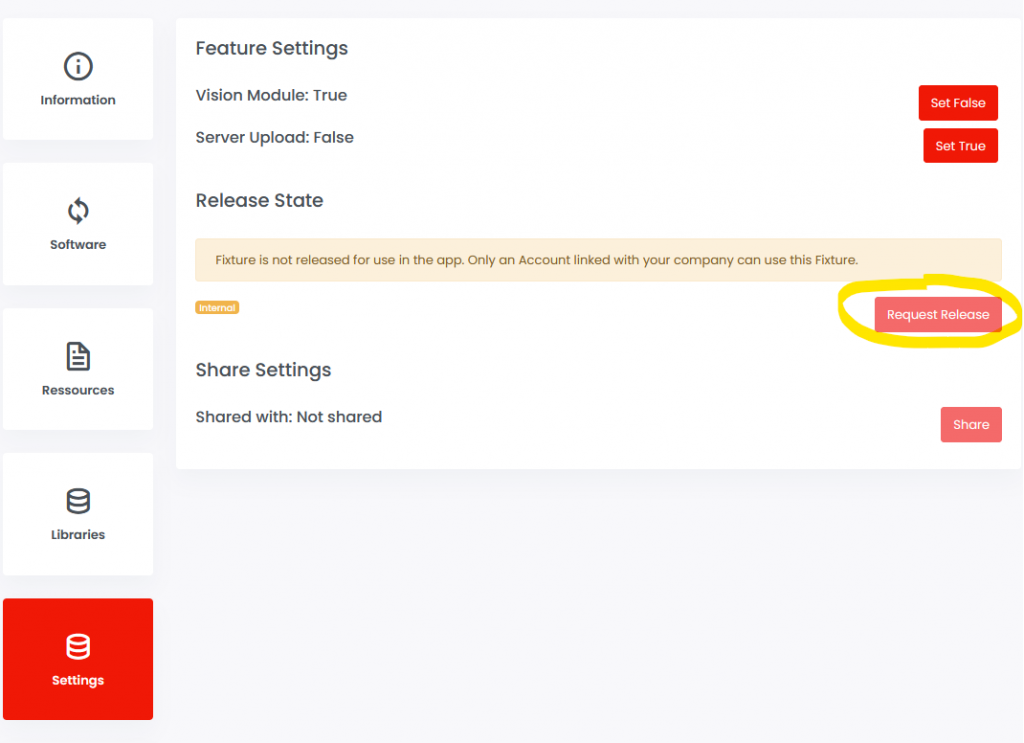
After release approval, continue with the production chapter: purchase production licenses, flash or update Vision modules, license modules, and verify the first production sample.
Share fixture access
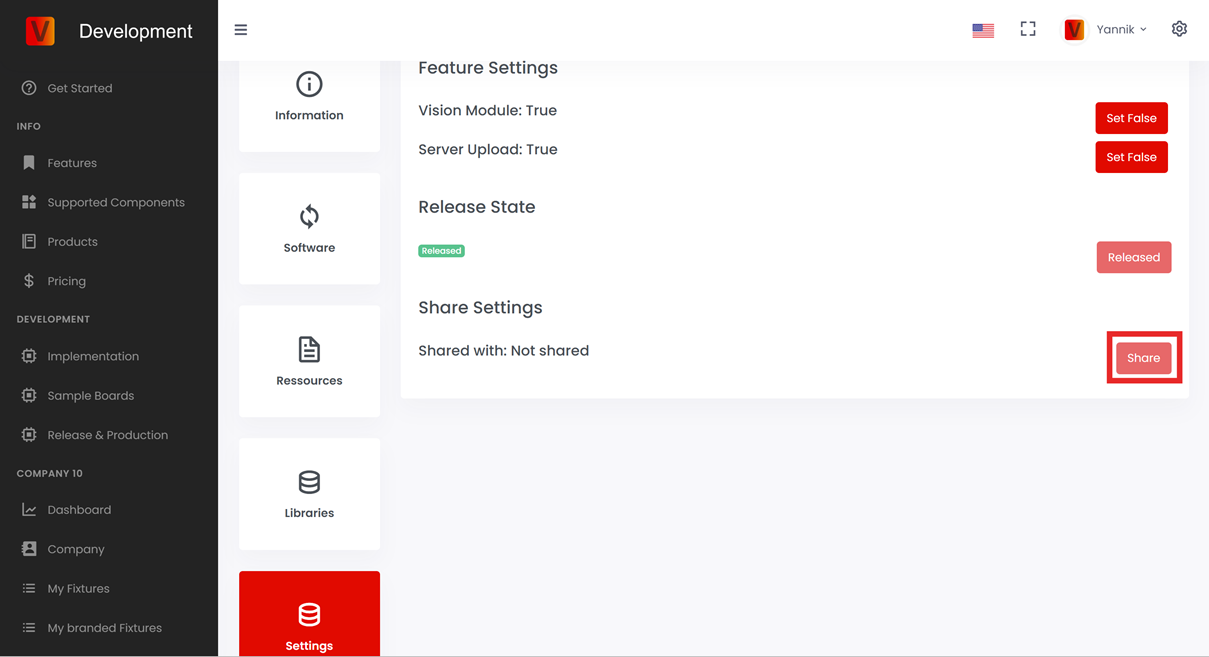
If you manufacture the fixture as an OEM and another company owns the brand, share fixture access with that company after the fixture entry is ready. The brand can then maintain product data or release information according to the agreed workflow.