




Creative 配置
启用 Test Mode 并连接到 fixture 后,界面应如下所示。 要创建 Creative Config,请点击 “Creative Config”:
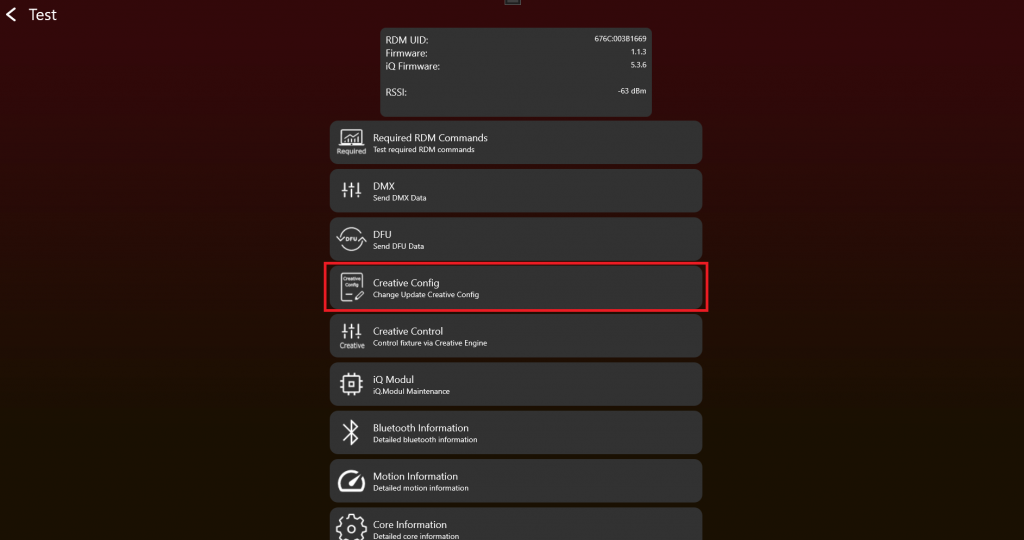
如果目前一切正常,就可以为 App Control 准备 fixture。在这里可以创建、加载或写入 Creative Config。每种 fixture type 都需要 Creative Config 才能通过 App 控制。Creative Config 包含 pixel 数量、位置等信息。
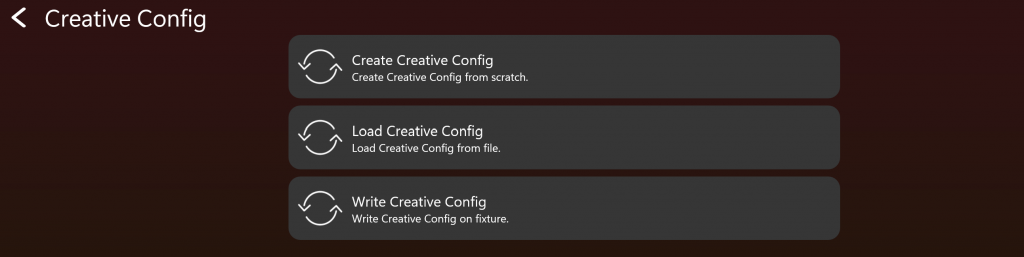
我们从创建 Creative Config 开始。点击 Create Creative Config。
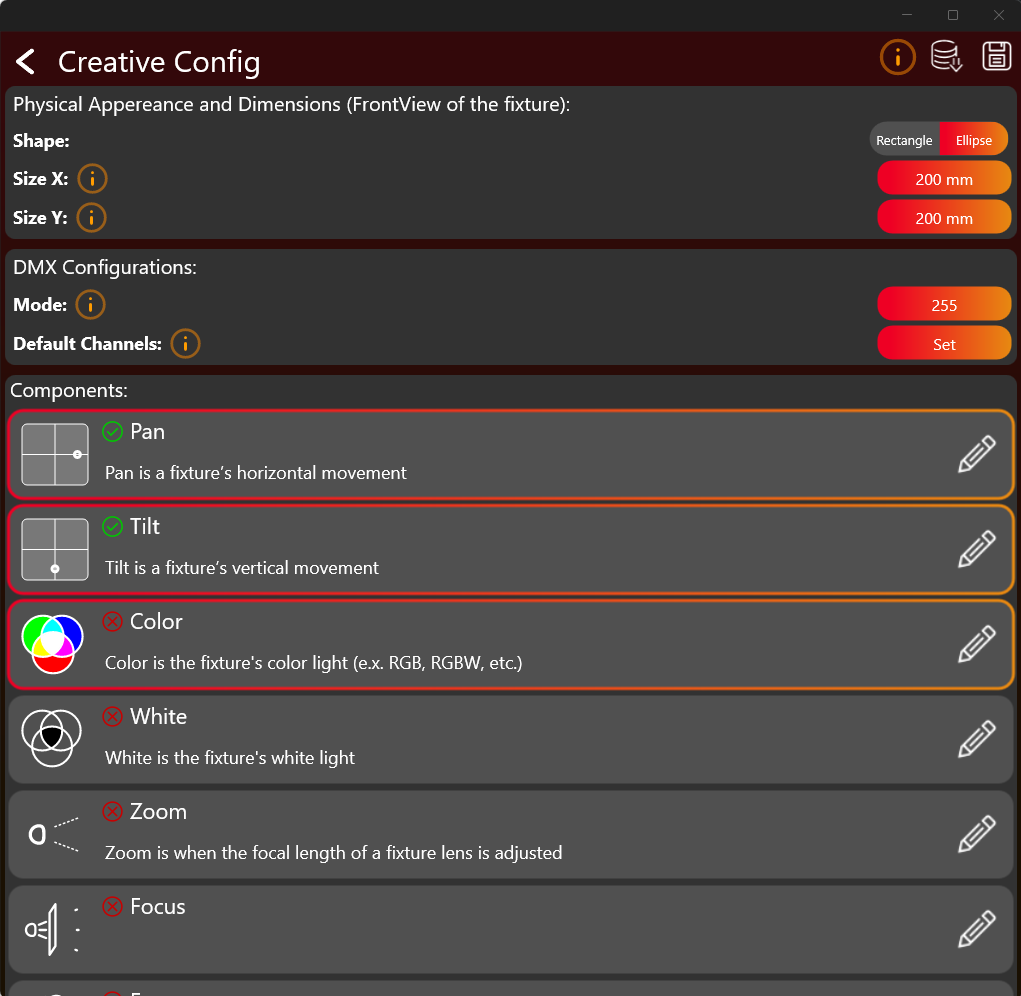
Click on the buttons to set the desired values. Select and configure each required component (like Pan, Tilt Color, White, Zooms, Focus, Smoke etc). Tapping on the whole frame selects the component. Select only components your fixture actually supports. By clicking on edit pencil on the right the configuration can be edited. A green checkmark indicates that the configuration for this component have been done.
使用橙色 info “i” 按钮查看对应主题的更多信息。
完成配置后,应将其保存为 .json file,并通过顶部按钮写入 fixture。
Color Component 颜色组件
The Color Component 颜色组件 can be quite challenging to configure. So there are some more detailed information explained here. After pressing the edit button of the Color Component 颜色组件 a new window appear which looks like this:
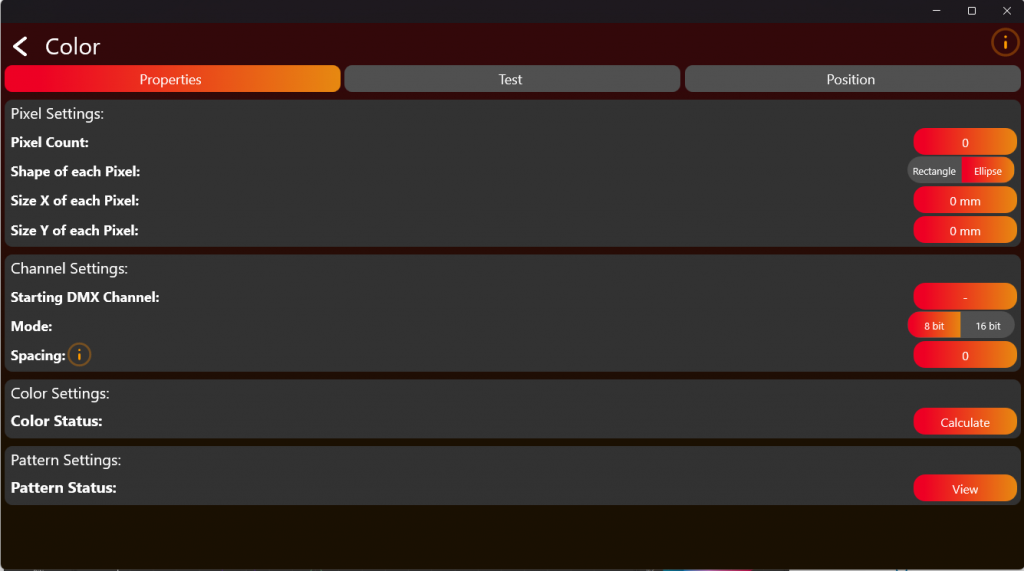
这里需要定义 fixture 的 pixel count,只包含可通过 DMX 控制的 pixel。然后输入用于控制 LED 的 DMX information。配置后,需要使用顶部 tabs 测试并定位 pixels。点击 Calculate 进入 Color Settings。
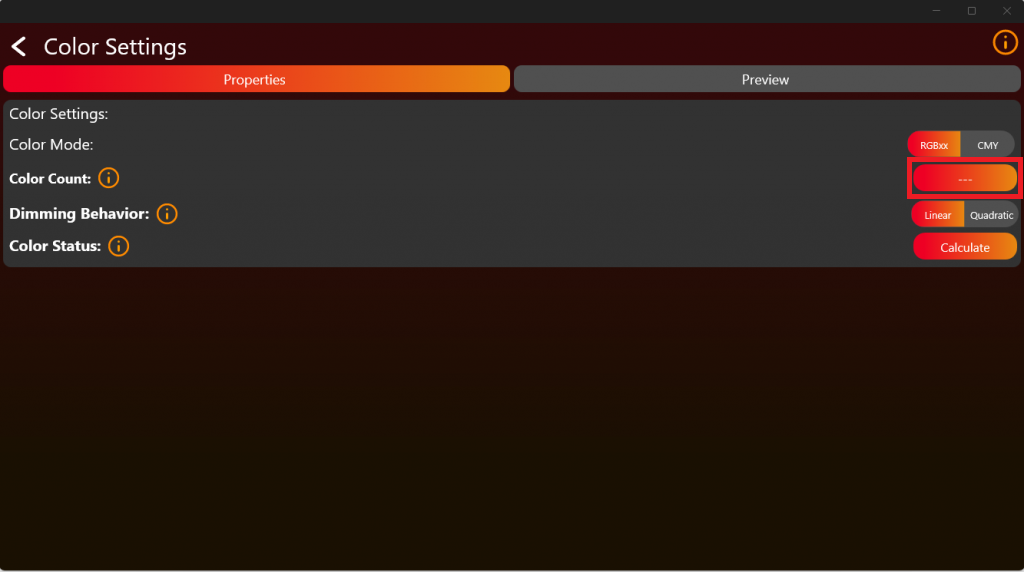
接下来是较复杂的部分:Color Settings:
Select the Color Count of the fixture. RGB for example has 3 colors. For the next steps we need the Color Information:
Therefore we need the spectral output of each Color at full in brightness relative to each other. For this kind of measurement you could use any spectrometer which has a resolution of 1nm over the Range from 380nm to 780nm. For Example the UPRTEK MK350N Premium.
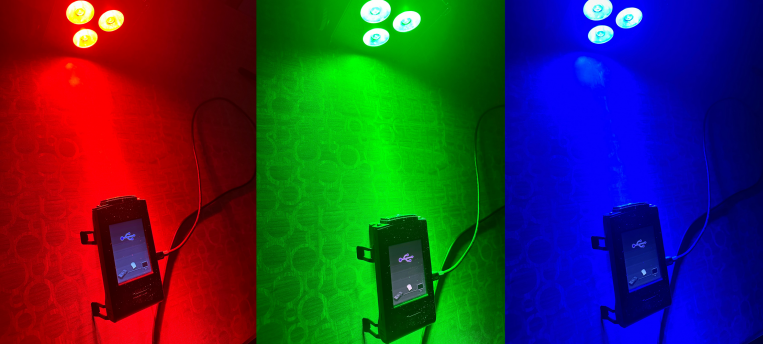
Therefore place the fixture in a appropriate distance to the spectrometer. Make sure the mixing of the colors from the fixture on the detector is as good as possible. Also measure the colors with an appropriate cooler temperature when there is no temperature compensation on the fixture side. Measure each Color independent as you can see in the following picture. In this example it is done via a RGBW LED Source. We support up to 6 Color LED Sources.
The following example is with the UPRTEK MK350N Premium:
After measure you should get the spectral response of the color relative to the others. Like this:
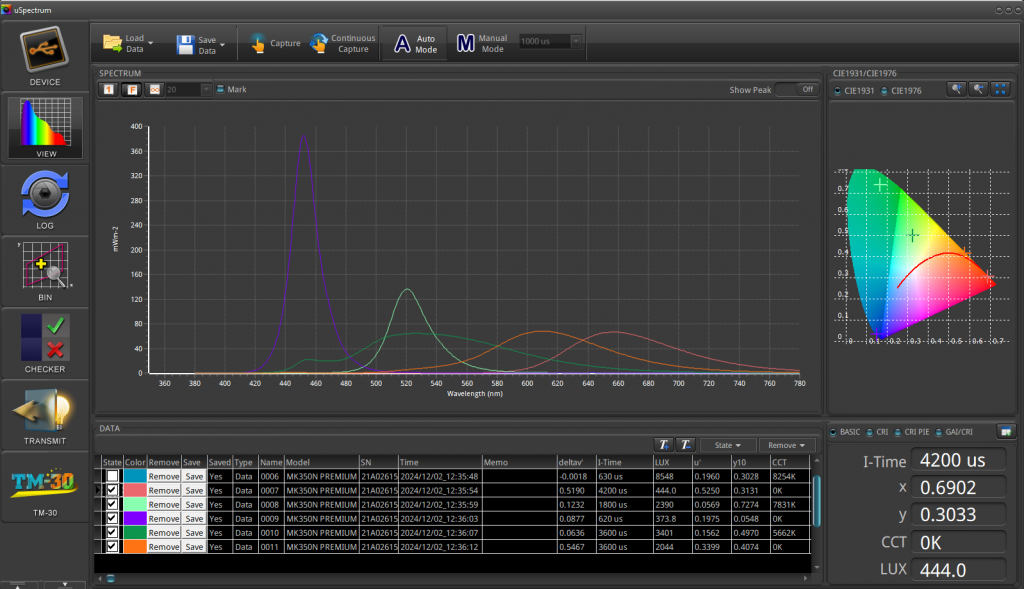
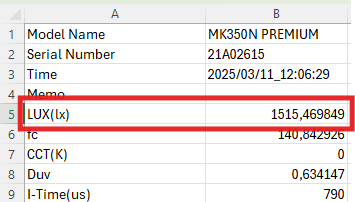
The results of the UPRTEK MK350N Premium will be saved in an Excel file. Refer to the provided document for an example format:
The necessary illuminance value is LUX (lx), in our example, it is approximately 1515.47 lx.
In the next step, extract the required spectral data from 380 nm to 780 nm (mW/m²). Refer to the image for an example:
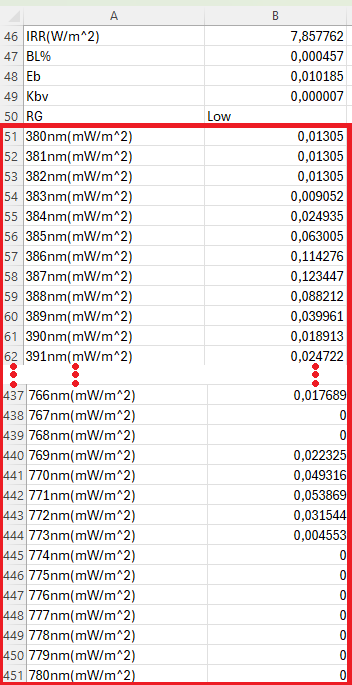
Copy the values displayed within the blue square:
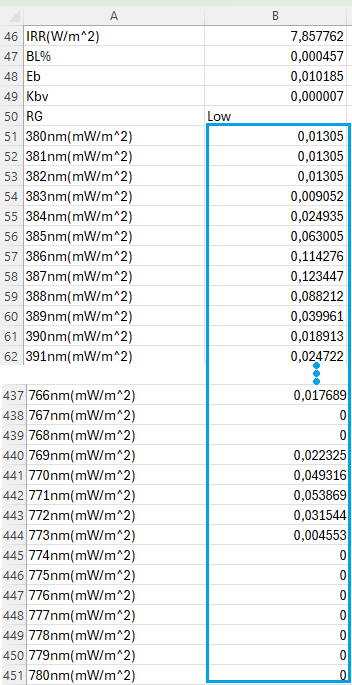
Insert the values into a new .txt file while ensuring the required format is met. For better understanding, refer to the example file.
Format requirements:
- The decimal seperator must be a „.“ (dot). Values must be separated by a „,“ (comma). All values should be arranged in a single line without line breaks.
This can be achieved for example in Notepad++ using Find and Replace function:
- Replace „,“ with „.“
- Replace „\r\n“ with „,“ (Ensure Search Mode is set to Regular expressions).
In the picture below it is a configuration for 3 Colors, for example RGB. From the available options, select „Custom“, then you will be prompted to upload the .txt file containing the spectral data:
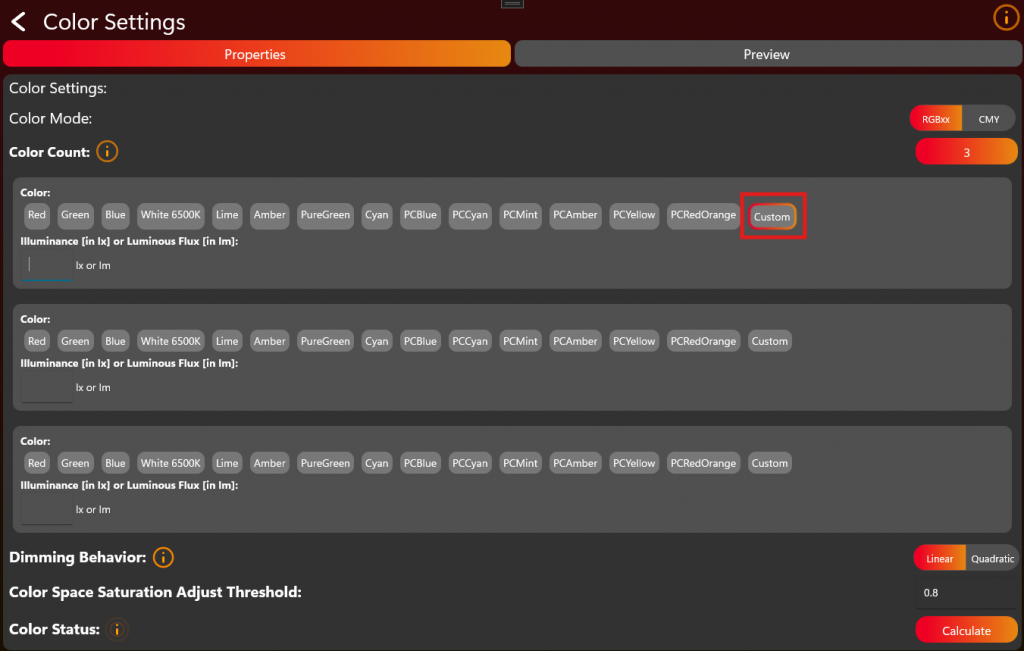
You can enter either the illuminance in lux (lx) or the luminous flux in lumens (lm) for each color.:
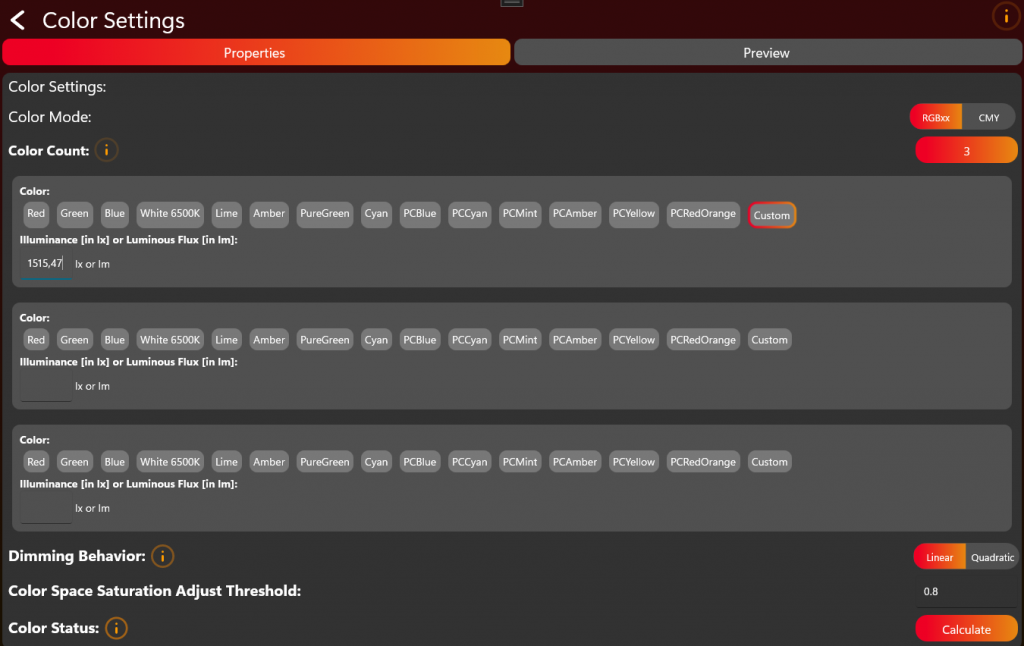
Repeat and upload the spectral data and enter the illuminance value for all LED colors.
When finished press Calculate and wait until the calculation is finished. Depending on the ColorCount this may take some time.
保存并写入 Creative Configuration
现在 Creative Configuration 已完成,并返回第一个编辑页面。右上角可以将配置保存为文件,或直接发送到 fixture 进行测试:
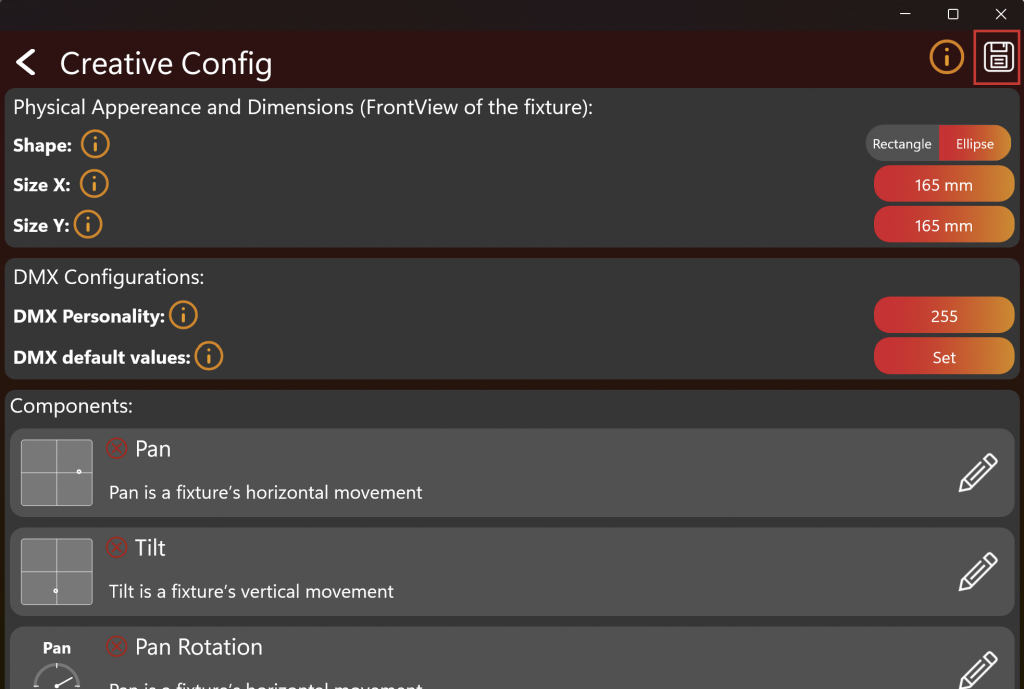
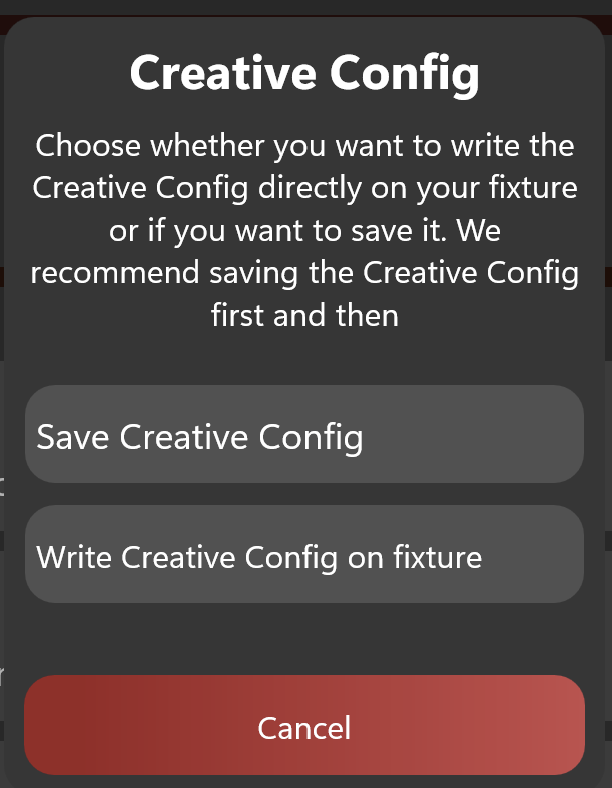
为了稍后上传到 web-service,需要保存该文件。下一章的 control test 要求该配置已写入 fixture。